What are caches and what do they do? As usual, going to lean on Wikipedia to help me out:
From https://en.wikipedia.org/wiki/Cache_(computing):
In computing, a cache is a hardware or software component that stores data so that future requests for that data can be served faster; the data stored in a cache might be the result of an earlier computation or a copy of data stored elsewhere.
So basically a means of getting data faster, sign me up!
Often, you’ll see multiple levels of caching on varying pieces of infrastructure, whether those pieces are all contained within a single piece of hardware (like a computer), or spread across multiple pieces of hardware (like a network). We have the need for speed, and caches gonna give it to ya… ideally!
https://aws.amazon.com/builders-library/caching-challenges-and-strategies/ has a lot of good information, but just to name a few:
So, it’s been a while since I’ve written anything, much less about Orleans. It’s Hacktoberfest though so I at least gotta try to get that shirt!
Like in past posts where I’m demonstrating something Orleansly, we’ll be working from my github repo starting here https://github.com/Kritner-Blogs/OrleansGettingStarted/releases/tag/v0.62.0. Prior to us creating another IOrleansFunction
, we actually need to write the thing we’re be demonstrating, the cache!
A cache abstraction can (and perhaps should?) have more methods available to it than what we’ll be doing in this post, but this isn’t meant to be a full fledged solution.
1 |
|
The above should look pretty straight forward, but just to go over it anyway:
TValue
is the type of value our cache will be storingIGrainWithStringKey
states that cache will have a string primary keyAddOrUpdate
- for adding/updating value
s based on a string key
(not to be confused with the grain primary key)Get
for retrieving a value
from the cache based on a string key
In case it isn’t obvious, we have two “keys” in the above declaration. A grain “primary” key, and a “key value pair” key. What’s the difference? Well by having the primary key be a string, we can get different grain instances for each individual string key we provide. Why would we do that? You may have different caches with different value types you want to store, bring up a different cache per customer, or a bit of both.
As for the implementation of the grain, I’m leaning heavily on an LRU cache from the package https://github.com/bitfaster/BitFaster.Caching/.
1 |
|
Again this should all be pretty self explanatory, just a plain old consuming of a cache and not (currently) worrying about things like parameterizing configuration, providing cache eviction methods, persisting the cache to disk in any way, etc.
Keeping this one pretty short and sweet, I implemented within the final code (found here https://github.com/Kritner-Blogs/OrleansGettingStarted/releases/tag/v0.63.0) our IOrleansFunction
so it can be played around with. I might have another post or two this month elaborating on this some more, just cuz I need to do some more PRs! (And get back into the habit of writing, but this is at least the 50th time I’ve said that)
This is a pretty short post, I think, but after a tweet about the release of Orleans.SyncWork, there was a bit of back and forth in the thread:
I reached out to Reuben shortly after, and now the repository is a part of the OrleansContrib organization! I don’t think this actually means anything of super significance, but it’s pretty cool! Maybe the package will now get better visibility!
That’s it!
First things first, what even is a workflow, and what does it mean to automate one? Well dear potential reader, a workflow is nothing more than a set of steps taken to complete a task.
From Wikipedia:
A workflow consists of an orchestrated and repeatable pattern of activity, enabled by the systematic organization of resources into processes that transform materials, provide services, or process information. It can be depicted as a sequence of operations, the work of a person or group, the work of an organization of staff, or one or more simple or complex mechanisms.
You can think of a workflow as the steps taken to accomplish “something”. That “something” can be any number of things, related to any number of subjects. In the context of this post, we’ll be mostly covering workflows as it relates to a build and release pipeline, also commonly referred to as continuous integration (CI) and continuous delivery (CD).
I’d like to cover both the CI and CD aspects of the Orleans.SyncWork, so let’s get started.
Before you’re able to deploy code through a work flow (continuous delivery), you need to be able to integrate it safely into your main/trunk. For dotnet, through a handful of CLI commands, the building and testing of code is pretty straight forward. Doing CI has the added benefit of bringing up a brand new environment for builds, each and every time, a similar idea to why I’ve been a proponent of build servers for so long.
1 |
|
The above command is the minimum you need to build either a solution file or project file on the dotnet side of things. From a continuous integration perspective, you may want to throw a few flags onto the command, such as:
1 |
|
and things of that nature, see what’s available to you with the dotnet build documentation.
That could look like this from the CLI:
Next is testing. I’ve probably already said it too many times, but test your code! Especially if you’re building libraries! Tests help ensure that the code you’re writing does what you say it does. Additionally tests be used as “documentation” in a way, if the tests are named well, and are invoking the code in a similar manner to how your consumer will use it, they’ll be in a better place to get started using what you’ve delivered.
Like the build command, the test command is quite straightforward as well:
1 |
|
Of course the above is the absolute bare minimum command, there are lots of parameters that can be passed to dotnet test as well.
A test run could look like this from the CLI:
With the above dotnet build
and dotnet test
commands, we have most of what we’ll need to put together an action to build and test our code, automatically!
There is lots of good information, even some specific to .net testing on the documentation. I pretty much used the documentation as a starting point, and ended up with this…
.github/workflows/ci.yml:
1 |
|
The above file should be mostly straightforward, first we give a name to our workflow with name
, specify the triggers for the workflow, in this case “on pull requests against the main branch”. The file then goes on to define the job “build”, which specifies an OS to run on, then steps. The steps do a few things of note:
dotnet build
command, as if this explicit restore step were to fail, we’d more quickly know at what point of the build there is a failureWe have a few new flags in our build and test commands, namely specifying a configuration of release, and don’t restore/build on steps after those steps having already occurred. One final note is the --filter "Category!=LongRunning"
- I was having trouble with the test runner getting through the tests I had laid out. They took 3 minutes to run locally, but ran for over 25 minutes on the build agent. Due to this fact, I added some classifications of “category” to the longer running tests, and excluded them from the test run in the above ci.yml file.
Continuous delivery is a lot like continuous integration, and builds on top of it. I’m of the thinking that CD should do everything CI should do, or perhaps even better, actually rely on the CI, rather than redefining the steps in your CICD like I ended up doing. That was a bit rambly, but CD should do everything CI should do, except with the additional step of actually delivering (deploying/pushing) the code as a part of its workflow.
That delivery part can have a lot of nuance to it that ups the complexity by a significant amount when compared to just “CI”. What does it mean to actually deliver code? Well, that could depend a lot on what type of code you’re actually delivering. In my case, I’m delivering a NuGet package, which has its own complexities, but what else is there? Well the other obvious thing that comes to mind is a web site / web api, one which could potentially have database changes to roll out in addition to the code. This to me, has the potential to be worlds more complex than just pushing a NuGet package up. How do you not only handle failures, but detect them and roll back, in the case of something going wrong with either you web push or database push? Perhaps I’ll be able to explore that one day, but for now, let’s get back to the NuGet package.
So, is there a complexity with delivering a NuGet package? Yes. NuGet package versioning can be a big undertaking when it comes to manual deployments, much less CD; as there is a requirement of NuGet packages being immutable. Does this mean that for every check in, on every potential branch that will be pushed to NuGet, you need to update some text file or code to indicate the next built version? That was my initial thinking, but thankfully that is not the case with the help of Nerdbank.GitVersioning.
I don’t think I have my CICD set up exactly how I’ll end up having it, but for right now it works. I installed the NerdBank.GitVersioning tool and package, and now for each build, I get a unique version number for the NuGet package upon build. I can toggle between prerelease or release packages, and can even publish “nightly” builds that contain a commit hash on them, all in the name of uniquely identifiable NuGet packages.
There was a fair amount of setup, that in some ways I’m still working through, but this article is already getting long enough, take a look at the PR(s) if you’re curious: https://github.com/OrleansContrib/Orleans.SyncWork/pull/8 and https://github.com/OrleansContrib/Orleans.SyncWork/pull/13. The “tldr” of it is, nbgv
tooling uses the git history to rev the version number being used during builds, allowing for unique build numbers each time the CI/CD fires.
There’s been a fair amount of information so far, but between our CI action and the information about GitVersioning, we have everything we need to put together a “first pass” cicd.yml. For CI, we were doing builds/tests against PRs to main. For CD, we’ll want to do delivery when code is pushed to main, as well as branches that begin with “RELEASE/v*”. My thinking here is that since we’ll be integrating often into main (theoretically), we don’t necessarily want to create full “new release packages” for every commit to main. We could however, create “prerelease” NuGet packages to main for each commit, making those changes available to the NuGet feed, but them not being labeled as a release version. Otherwise I have Nerdbank.GitVersioning set up to release “release” versions of packages from the “RELEASE/v*” branches.
The CD action file itself will look very similar to the CI one, just with the few additions of dotnet nuget...
commands, shown below:
.github/workflows/cicd.yml
1 |
|
In the above, you’ll notice that it’s more than 50% “the same file” as CI. I was going to potentially look into composite actions as some point, so see if I could instead “chain” CI and CD, rather than redefining the CI within the CD file; but I’ve not yet had a chance to explore that.
Aside from the change to the “on” event (pull_request -> push), there are two new commands at the bottom dotnet pack
and dotnet nuget push
. The dotnet pack
command is used to “package” up the project specified into a “.nupkg” file (and snupkg in this case for symbols). Finally the dotnet nuget push
command is used to push those newly packed NuGet package(s) to the feed specified of nuget.org. On this command you’ll also see the {{secrets.NUGET_API_KEY}}
portion of the command, this is defined as a repository secret and it can be used to pass “secret” information to things like workflows, in this case it’s my NuGet API key. These secrets can be set from the repository “Settings” -> “Secrets”:
The “putting out a release branch” is still a bit of a manual step for me. I need to run nbgv prepare-release
from my local environment, then push up the subsequently created “RELEASE/v*” branch and updated new pre-release version that is created under main.
That may not have made sense.
If I’m working in main with a prerelease version of “1.0-prerelease”, when I nbgv prepare-release
, main will be (as an example) updated to “1.1-prerelease” with a branch called “RELEASE/v1.0” created having a release version of “1.0”. The push of these two changes will currently build a new prerelease package of “1.1-prerelease” and release package of “1.0”, both of which will contain “the same content” at the time of being pushed.
I’m not sure how I feel about the above. I like the automatic build and deploying of packages, but I don’t like having to create the release locally. I could conceivably create a manually dispatched workflow that did this release preparation for me, but then there’d still be the slight strangeness around immediately pushing out a prerelease package with no changes in comparison to the “previous” pre-release package built, and the new release package being built. I’m not sure what the “right flow” is quite yet, what I have right now does work, it just seems a bit messy.
Perhaps I’ll eventually look into workflows more like this:
Been talking about it for years at this point. Between my other posts on Orleans, or that one time (so far?) I was on a podcast to talk about it, I never got around to writing the thing down that I was always talking about. That has changed now in the form of a NuGet package, and you too can solve problems (maybe!) with a small amount of code exposed by the package!
As a refresher, I needed to come up with a means of distributing compute calls for 10s of thousands of crypto calls, all hitting within a single moment. I had done some experimenting/proof of concepting, and at the time settled on Orleans to accomplish the distribution. Though I (still) haven’t used Orleans in more of an “intended use-case” of doing lots of distributed asynchronous work, using it in the way we are works pretty well for our use case.
If I were to do it all over again, perhaps it would make more sense to utilize a message queueing system with tried and true infrastructure. I’m not sure if I didn’t know of these concepts at the time, but this route may have been a better option? Even though the Orleans option seems like it would “conceptually” work, I’ve still also not personally worked on bringing up a queue system with workers and notifications. I feel like that was quite a brain fart when re-reading… but basically there may have been better ways to accomplish what this code does, but I still haven’t experimented with those better ways!
Anyway, onto the NuGet package!
There are only a few moving parts when it comes to the package:
All your CPU bound, long running, and synchronous work will be implementing from this class, though it will be through the extension of the SyncWorker<TRequest, TResult>
abstract base class.
This interface exposes a few separate methods/contracts that allow for the interaction with the long running grain work:
Start(TRequest)
GetWorkStatus()
Completed
or Faulted
will then allow for the return of data from one of the following two methods, depending no which status the grain is in.GetResult()
Completed
state, in the form of TResult
.GetException()
Faulted
state.This is the abstract base class of the grains. This class implements ISyncWorker<TRequest, TResult>
and provides implementation details for the methods describe from the previously mentioned interface, as well as a few other methods:
CreateTask(TRequest request)
Start(TRequest request)
method, which sets the _task
state on the instance, and enqueues that long running work onto a LimitedConcurrencyLevelTaskScheduler
PerformWork(TRequest request)
_task
, and is the “thing” that needs to be implemented within the implementations of this class.This is a class that was more or less copied from here. Its intended use is to limit the amount of work that can be performed at any one time as it relates to the work queued against this scheduler.
Without making use of this scheduler, queueing a massive amount of work on the “normal” scheduler quickly overwhelms the Orleans silo in such a way that there are no resources available to accommodate the asynchronous messaging calls required for Orleans to operate. Using this scheduler, at some configurable level under the “amount of work that conceivably be done concurrently”, the Orleans cluster is able to continue asynchronous communication, while also performing these long running tasks being worked through the limited concurrency task scheduler.
Aside from the package itself, the repository has a few other projects:
a “sample” implementation of a set of Orleans grains, as well as the cluster hosting. In this project, several long running grains are implemented and registered to the Orleans silo. Those grains are then exposed through api endpoints, or are used as a means of testing some of the logic of SyncWorker<TRequest, TResult>
within the Orleans.SyncWork.Tests project.
This project exposes an Orleans Dashboard, as well as SwaggerUI, for keeping an eye on the test cluster and invoking calls to the API respectively.
A Benchmark project has been set up to get an idea of the timing differences between serial execution, Parallel.For
, and the parallel execution offered through the SyncWork<TRequest, TResponse>
implementation. The latter can be slower then Parallel.For
, but faster then the serial execution - though keep in mind this benchmarking testing is done completely locally, where in a real world scenario, you’d be bringing up multiple silo hosts to make up a highly available cluster. At this point it stands to reason that the functionality exposed by this package will far exceed the performance accomplished with a single machine.
An initial running of the benchmark gave the results:
Method | Mean | Error | StdDev |
---|---|---|---|
Serial | 12.284 s | 0.0145 s | 0.0135 s |
MultipleTasks | 12.274 s | 0.0073 s | 0.0065 s |
MultipleParallelTasks | 1.723 s | 0.0185 s | 0.0144 s |
OrleansTasks | 1.118 s | 0.0080 s | 0.0074 s |
Though keep in mind this can be further improved with an actual cluster of orleans silos, rather than just my one locally.
Unit testing project for the work exposed from the NuGet package. These tests bring up a “TestCluster” which is used for the full duration of the tests against the grains.
One of the tests in particular throws 10k grains onto the cluster at once, all of which are long running (~200ms each) on my machine - more than enough time to overload the cluster if the limited concurrency task scheduler is not working along side the SyncWork
base class correctly.
So that’s it. This is quite a bit simpler of an implementation that I ended up originally making for work. The same basic idea is there, but the abstraction is quite different, if it holds up well enough, maybe using this package will be in order!
You can use this package to enable your Orleans cluster to handle your long running sync work, like 10s of thousands of crypto calls!
I went through updating hexo to the latest version, under the hopes some of the weird code highlighting issues would be fixed.
Example:
After the update:
It works!
I wanted to do this for a while, but was running into issues around my post_asset_folder
images no longer resolving by just specifying cover.jpg
(as an example). In the new world, I need to (for front matter only) specify the full path (minus root): /2021/11/20/my-post-title/cover.jpg
.
Not sure what the cause of this change is, but I spent too long looking into it. Just had to go and update the front matter links to images for about 57 posts.
I did all of this because I had a few other posts in the (potential) works, and wanted to be in a better, more up to date state.
So yay!
Most of my posts come from my daily job, either prep from stuff I’m doing, planning on doing, or have done; In this case the coding blocks slack group, led me down the path. We were talking about Adsense in the #rants channel, and I had commented on how I have never had a payout from Adsense. I was then informed by @swharden, that I wasn’t actually displaying ads on my blog!
This of course led me down a rabbit hole of google “stuff” such as adsense, google search console, analytics, and an SEO optimization resource.
The tldr of my adsense problem was I hit the “verification threshold” of 10 dollars in revenue, but had not yet hit the “payment threshold” of 100 dollars, and the verification process involves snail mailing a pin to my residence… which happened to go to my old house… whoops! So now hopefully, within the next 3-4 weeks I’ll have another PIN so that I can start making those sweet sweet pennies every now and then! But in the interim, and seemingly for the past 8 or so months, I’ve been out of luck for any hopes of ad revenue /sad.
Anyway, that was the start of my journey pre-rabbit hole, and here’s a few pretty quick updates I was able to go through to get my site more SEO friendly.
At this point, I had submit for my new PIN, but the blog has been dusty and neglected for a while, so I figured I would take care of some things regarding its SEO. I ran my site through https://freetools.seobility.net/ and one of the pieces of advice was to not use H1s in HTML? At least I think it was this site that stated that. So, I followed the directions, and changed all MD #
s to ##
. This was a pretty simple find and replace and took all of 5 minutes for the entirety of my posts.
This was a term I hadn’t heard in years! I didn’t know sites actually still used these; but apparently they are quite useful for crawlers. I use the hexo blog engine, which thankfully had an NPM plugin for generating a sitemap as a part of the static site generation process:
Then it was a matter of adding some configuration to my config.yml
file:
1 |
|
and then providing my sitemap.xml file to google search console:
I don’t know if this step actually helps SEO or not, but it was recommended to me nonetheless: https://support.google.com/adsense/answer/9889911?hl=en. I added another static file to my hexo blog which at a minimum is seemingly a “best practice” for reasons of transparency.
I don’t have much more to say about this, it was a quick 7 line json file saved into sellers.json, and is now available on the site.
One additional thing I didn’t realize I needed was a robots.txt. This file, described here, is used to control which files on a site a crawler has access to, assuming it follows the rules.
Initially, I had set up my robots.txt to have the following:
1 |
|
The above file allowed crawlers to all pages of the site, and also shared the location of my sitemap, which notes each page on the site. This helps search engines like Google to be better able to return relevant search results when keywords are hit from my posts.
After having read a bit more through https://developers.google.com/search/docs/beginner/seo-starter-guide, I saw that it recommended your robots.txt disallow crawlers from searching through your sites own “search pages”. The point of the search engine is to find literal content, not find search pages within search pages, so this makes a lot of sense!
I have at least a few “search” type pages built into the static site that is my blog, namely:
We’ll add those to the robots.txt:
1 |
|
These were just a few of the low hanging fruit that were out there regarding SEO and my blog. There are definitely more things to take care of, but this is what I had time for in some downtime this week!
Obviously one of the most beneficial things you can do for your SEO… is to actually post more content… I’m working on it, sometimes!
In the previous post, it was demonstrated how to utilize “repository wide” variables located in a Directory.Build.props folder. With these variables defined, you could use the variable, rather than a literal value, in your csproj to keep dependencies throughout the repository on the same version.
There is now a feature (in review) at https://github.com/NuGet/Home/wiki/Centrally-managing-NuGet-package-versions which allows for doing the same thing, just in a more elegant way, at least in my opinion.
The in review feature relies on a new “repository wide” like file called “Directory.Packages.props”. Using https://github.com/Kritner-Blogs/DirectoryBuildProps/releases/tag/v1.1 as a starting point, we’ll introduce the centralized package versioning.
First, we’ll update the “Directory.Build.props” file to contain the following:
1 |
|
This tells visual studio, rider, the dotnet cli, etc., that the current folder, as well as its children (so repository wide if used at the root of the repo) that central package versioning is used.
Within the same folder as the “Directory.Build.props”, we’ll be creating a new file “Directory.Packages.props”. This file is used to specify the NuGet package version used for all packages used across the repository. Continuing to use the “Kritner.SolarProjection”, we’ll set up our new “Directory.Packages.props” file to specify the version.
1 |
|
In the above, we’re just defining the package as well as a version that should be used when that package is listed within any csproj file at the same level or as a child of the directory where the “Directory.Build.props” file is located.
Note that the above file does not include the package automatically in csproj files, it only defines the version to use when the package is listed in the csproj file.
Now that central package versioning is being used in our repository, we’ll need to make updates to our csproj file to make use of it; namely removing the version declaration from our csproj files.
Currently, we have the following in our csproj file:
1 |
|
In the above you’ll note that the old “variable style” version is being used, now with central package management, we don’t even need that:
1 |
|
In the previous post we learned how to utilize variables to control our nuget package versions used across the repository, where desired. In this post we explored how to define a package version in one place, and for that same package version to be used across the whole repository.
There are a few other things to note when using central package versioning however:
I feel like I always say it’s been a while since my last post… but this time it has in fact been a while.
So… working on a multi factor authentication setup for a freelance client. Have the multi factor one time password all set up, but now I need a way to implement a “remember me for 30 days” feature. That should be relatively simple, right? Can’t we just use cookies?
Not so fast there past me prior to thinking it through! Cookies can easily be modified by the client, because they’re stored on the client local storage and aren’t signed with a digital signature!
Here’s some context into the situation:
Basically, I needed a way to store local to the user a secure (tamper proof) means of indicating the user has been dual factor authenticated for 30 days. The simplest way to do this would seemingly be to store a cookie with a value of the expiration date and user name. However, this first idea I had falls apart quickly, since a user could just change the cookie value (either expiration date and/or user name) and be able to get past the second factor. The second factor one time password (OTP) entry should only be presented to the user if the cookie is valid, for the specific user, and is not yet expired (30 days from the cookie creation).
There are a few things that are needed for a client side solution:
Once documenting the above requirements coupled with the above screenshot, it became pretty clear to me that some sort of cryptography could be used to ensure the tamperproof part of the thing being stored on the client side - in this case a cookie.
HMAC - Hash-base Message Authentication Code - is a cryptographic operation that utilizes a “key” and “message” to produce a “mac” which is (more or less) the combination of the two pieces. The general hmac signature looks something like this:
1 |
|
The key
portion is secret between one or more parties - in my case one party, and the message
is data that is to be validated as genuine. In my case, the key
will be kept secret from the user, as that key
is what verifies the message
is what we put into the cookie.
What’s a good key
to use you may be asking yourself? Well, it’s not the user name, though it’s something similar. The user already knows their own username, so it’s not a good candidate for a key
. There is however, their password, specifically their password hash. The user would not know the hash of their password that is stored in the remote system, so it is a good potential candidate for a key
.
The user’s password is computed basically like this:
1 |
|
Where password_digest
is the output of running salt
concatenated with plaintext_password
through a one way function H
, work_factor
times. The password_digest
is not something the user would know, as their salt changes with each password change, nor do they know the underlying one way function applied to their plaintext_password
.
So, now we have a key
candidate, what about the actual message? The message is thankfully very straightforward, and we can use the datetime of the OTP cookie expiration. The full HMAC call will end up being: cookie_hash_content = hmac(H(password_hash), expiration_date_string)
.
This entire cookie_hash_content
can be stored in the body of the cookie, though we will also need to stored the expiration_date_string
within the cookie as well, so that the server side can reconstruct the inputs into the hmac
call, and verify they match.
Thankfully, this is easy enough to do with a pipe (or other) delimited set of fields within the cookie. I will be using this format:
1 |
|
Validating the above cookie at authentication time is as simple as:
cookie_hash_content
by comparing the cookie’s second part of the split, to a newly generated hmac(H(password_hash), expiration_date_string)
The above pseudocode also has the added benefit if the user changes their password, they will immediately fail the OTP cookie check, as the mac using their old password hash will no longer match the newly generated/checked password hash upon login. This in a few ways makes things just a bit more secure.
Here is a quick run through of the HMAC (and a few unit tests) using fake expireDates
and passwordHashes
: https://replit.com/@Kritner/TamperProofCookies#main.py
key
is not known (or knowable) to the end userkey
being utilizedcookie_hash_content
by re-computing the value based on the values stored in the cookie itself, along with the additional data of key
that isn’t in the cookie, and can’t be known by the user, so there’s no chance the user would be able to come up with “the right information” that could pass the verify step.Resources:
]]>I’ve never actually used NDepend, and have only otherwise scratched the surface using other code analysis tools. Perhaps this will be a mis-categorization, but the few I’ve worked with previously include:
The idea of tools like NDepend seems pretty straight forward, look through your source code, and identify potential pain points that could use another look. Sounds pretty simple in theory, but I’d imagine the details of such analysis goes way over my head.
Visual Studio is no longer my IDE of choice when working in .net core, but I dusted it off to play around with NDepend. It was quite simple to get installed as a plugin for visual studio, and here’s a helpful video if it’s not otherwise obvious on how to get started: https://www.ndepend.com/docs/getting-started-with-ndepend
I didn’t really know what to expect, and I don’t have any real significant (personal) code bases that I can hook this up to, so for now I’ll run it against my Design Patterns repository to get a baseline.
To kick off the analysis I clicked the circle icon in the bottom right of my visual studio instance, and was quickly presented with a dashboard that looked like this:
Note that this wasn’t actually my first run, I think it was my second or third after having changed a few lines of code in between runs to get a delta in the analysis. Looking at the dashboard it became apparent the analyzer must keep “state” as to what the issues are over time; which is a great sounding feature as it will allow you to track your code “smells” as your code continues to be developed!
Upon first gazing at the dashboard (pictured above), I was honestly a bit overwhelmed. It was a lot of information, and I didn’t see an immediately obvious “starting point” of what I should be concerned with.
Twice weekly I meet with a few friends over a video/screen share session and we work through plural sight courses together, this week I actually had them on to do a “first impressions” of the NDepend tool; unfortunately my OBS setup was hosed up, and I lost most of the audio. I say this as it is not only my own “first impression” but others as well - namely several who have (slightly) used static analysis tools previously, and others who have not.
Here I’ll go over what I considered to be the “sections” that were present when going through the NDepend tool.
Sorry for the awful quality of the above image, it was taken from the recording that I couldn’t end up using due to lack of audio.
This seemed to be more or less the “meat and potatoes” of it all. We can see numerous metrics, some of which are pretty self explanatory, but several of which perhaps not so much for someone who is coming from a code base that has no testing; which granted is itself kind of a problem.
I did make a few adjustments to the code from the previous time I ran analysis, I am a big fan of tracking the code quality over time - so this is a huge benefit in my book. It was not immediately obvious to me how this information is tracked over time in a “multi developer project” situation. I am under the assumption that some of the files that were added to the project itself would need to be added to source control in order to track the information over time, but I’m not really a big fan of that (assuming my assumption is even correct). NDepend can be installed in some build systems, which I would guess would keep the analysis separate from the source, but tied to that repository in some manner. I believe I saw integrations for at TFS and TeamCity, I wonder if it could also be integrated with something like TravisCI or GitHub actions.
The sections:
Overall I found the dashboard pretty useful, if not a bit overwhelming. One thing I think the dashboard could use that would benefit the users of NDepend greatly, especially when they’re just starting out, is a little “i” popup per metric:
The popup could at a minimum describe the metric, but probably better still, link to the NDepend documentation on what exactly the metric means, what goes into its calculation, and why improving upon the metric and monitoring it can be beneficial to your code base.
I was not really sure where to start here. When poking around with checking and unchecking things within this window, it seemed to impact what is “in scope” of the analysis. It seems like you can probably also define your own rules to look for in your code base, but we did not get into that in our first excursion into NDepend.
When clicking on an action item within the dashboard be it “good or bad”, this pane was updated. In the case of failed rule checks, you’d be given a means of fixing it, with navigation to the code block that failed the check. This section was quite useful for helping get more “green lights” on the dashboard, though it was quite cramped in the tab it showed up in, though I understand why it showed up there, so you could view the dashboard and/or problem code while keeping the failed rules list visible as well.
Overall I find the information provided through NDepend to be quite useful, having a tool like NDepend running as a part of your build process, even automatically rejecting PRs if certain quality gates aren’t met sounds fantastic.
I did have a few concerns about “what exactly I’m looking at” which could be remedied via “?” or “i” links on the (granted already quite busy) interface; but I think overall would be a welcome change, especially for first time users (perhaps a feature toggle?).
How does this static analysis compare with other, now free options like Roslyn analyzers, or other tools like sonar, or perhaps even ReSharper? I would imagine there’s some overlap, but that’s not necessarily a bad thing if the multitude of tools bring something unique to the table. The analysis as compared to other baselines I found very nice, though I’m curious how it works in a “multi developer” setting, and with source control and build systems.
I look forward to actually implementing some tests in my analyzed project, and/or putting the tool up against something “more real” than my Patterns repository. Overall it seems like NDepend is a very powerful tool!
From Wikipedia:
In object-oriented programming, the decorator pattern is a design pattern that allows behavior to be added to an individual object, dynamically, without affecting the behavior of other objects from the same class. The decorator pattern is often useful for adhering to the Single Responsibility Principle, as it allows functionality to be divided between classes with unique areas of concern. The decorator pattern is structurally nearly identical to the chain of responsibility pattern, the difference being that in a chain of responsibility, exactly one of the classes handles the request, while for the decorator, all classes handle the request.
“Prefer composition over inheritance” might be something you’ve heard of before, and I feel like the decorator pattern is basically the epitome of this saying. Decorators are themselves implementations of an abstraction, that also depend on the abstraction itself. This allows for “composable” pieces of behavior in that you would likely have a single “main” implementation of an abstraction, then separate “decorator” implementations that build on top of it.
I’m not sure if that made sense, so hopefully an example will help clear things up.
For our abstraction, we’re going to create a service that retrieves the weather for us:
1 |
|
In the above, we have an interface IWeatherGettinator
that has a single method, which takes no arguments, and returns the weather; simple enough.
For this example, we’re going to pretend that to get the weather is an expensive operation, just because it makes one of the decorators of IWeatherGettinator
more interesting and easier to see the point of it all (IMO).
So for the implementation of the IWeatherGettinator
:
1 |
|
On getting the weather (which is a ~5 second operation), we get a random temperature and a value that indicates if it’s going to rain or not. Each time GetWeather
is invoked, it takes another 5 seconds to retrieve a random “weather” instance.
The above implementation should look something like this when you ToString
the retrieved Weather
via a GetWeather
invoke:
Getting the weather seems to take a pretty long time! Perhaps we can introduce our first decorator to get some timing information on the implementation of IWeatherGettinator
:
1 |
|
This might look a little strange, so let’s go over it a bit. The StopWatchDecoratorWeather
is an implementation of IWeatherGettinator
that also depends on an implementation of IWeatherGettinator
. You can see that the method implementation GetWeather
starts a stop watch, calls the injected implementation of IWeatherGettinator
, stops the stopwatch, and writes to the console the length of time the operation took.
Now you probably wouldn’t actually write a decorator exactly like the above, but you could do something like it, especially if you were to make use of a logging framework. Logging the above could make more sense, especially if the invoke took more than a certain amount of time.
How does the above get used? Well, you could “compose” your object like so:
1 |
|
You would actually want to be constructing these objects via an IOC container or something similar, this was to just get the point across… also there is some complexity to registering decorated objects with at least the .net core built in IOC container; though you could also use a factory to accomplish it more easily.
What does the above construction mean? Well, we’re instantiating a new instance of a StopWatchDecoratorWeather
which itself depends on a IWeatherGettinator
instance, in this case we’re passing in a concrete implementation of WeatherGettinator
.
Running the IWeatherGettinator
while making use of the StopWatchDecoratorWeather
would look like this:
Inheritance has an issue; an issue that can be solved through composition. I’ve mentioned this several times now, but it’s kind of hard (at least for me) to convey what I mean.
Say we wanted to introduce another piece of functionality; in this post we’re going to be doing it through the use of decorators, but just imagine for a moment that we weren’t.
In c# a class can only ever extend a single other class. If we ever wanted to “mix and match” behaviors of an abstraction that relied on inheritance, that can be extremely difficult to do. If we have an interface IFoo
, with an implementation Foo
, then had separate implementations A
and B
, both of which extended Foo
, how would we go about introducing yet another implementation C
, that needed some of its own unique characteristics, as well as the additional functionality provided by both A
and B
? This would be challenging with an inheritance scenario, but is really trivial when making use of decorators.
To demonstrate that, let’s introduce another decorator to our IWeatherGettinator
.
We’ve done some testing with our StopWatchDecoratorWeather
and determined that we could save a lot of time getting the weather if we introduced some caching. Thankfully, introducing caching via a decorator is very simple, and should look pretty similar to our first decorator!
1 |
|
In our new CachedWeatherGettinator
, we’re making use of some instance state to return the previously retrieved weather if it’s less than 30 seconds since it was retrieved. You’ll notice this implementation, like our first decorator, both implements and depends on IWeatherGettinator
.
We can now try out our new decorator like this:
1 |
|
And you’ll see that the “first” call to the IWeatherGettinator
will take the 5 seconds, but another call made immediately after will return much faster.
But even more interesting that that, is we can make use of multiple decorators for the same abstraction, the construction of which is considered composition.
What could that look like?
1 |
|
We’re “composing” our object by decorating our base WeatherGettinator
with multiple decorators! We have decorated the base object with both a StopWatch
as well as Caching
layer, mostly to demonstrate that the caching layer is in fact working. Let’s take a look!
Hopefully it should be pretty clear after going through the post why this pattern can be quite powerful, but just to reiterate:
In the previous post we learned a bit about health checks, how to create them, and view their “health” from the perspective of Microsoft Orleans. The end result was a single word response of “Healthy”, “Degraded”, or “Unhealthy”; not very exciting stuff.
In this post, I’d like to quickly go over how you’d go about not only reporting on the “overarching status”, but giving details on the individual health checks that make up that overarching status.
(Note: I did have an issue out there with a hacktoberfest label, that I did get a PR for, but I wanted to go a slightly different route in the end, though I did have it integrated into master for some time.)
The Health check documentation does go into some detail about how to accomplish this health check prettifying, but I’m not a huge fan of “manually” writing out JSON; instead I opted for an anonymous object.
A few new things I want to report on from the response to the health check GET endpoint:
Luckily all of this information can be made available to us via the HealthReport
generated as a part of the health check.
We’re going to introduce a new method that writes a custom response for our health check endpoint. From startup, we’ll want to provide a custom ResponseWriter
within MapHealthChecks
:
1 |
|
Where the referenced HealthCheckResponseWriter
is a new static class we’ll be introducing next.
the ResponseWriter
expects a method with the following signature:
You’ll notice above the method receives an HttpContext
as well as HealthReport. This HealthReport
will make available to us several pieces of data that we can report on, specific to each individual health check.
As for our actual response writer implementation, here is the original that was merged into master from L-Dogg‘s PR:
1 |
|
The above definitely works, but I’m not huge on writing the json “manually” (if that makes sense). I wanted to write another blog post on this anyway, as I already had a branch going (and didn’t actually expect a PR :O), so here’s my solution:
1 |
|
I find it a bit more concise working with the anonymous object.
We’re not currently generating “data” information from the health checks that the HealthCheckResponseWriter
would be able to make use of, so let’s take a look at what we could do there.
My intention for the “data” property of the anonymous object is to describe what would make the specific health check return a “Degraded” or “Unhealthy”, anything aside from those two statuses can be assumed to be “Healthy”.
If you recall, we already built thresholds into the health checks to represent the degraded and unhealthy statuses, now we’ll just need to provide those available to the health report.
Taking a look at the HealthCheckResult
class:
you’ll see that method takes in an optional IReadOnlyDictionary<string, object> data = null
, which happens to be the “data” member we made sure to return from our WriteResponse
method in the previous section of the post.
We will make use of this IReadonlyDictionary
to provide our “threshold” information on a per grain basis. I will be putting this threshold information into both the CPU and Memory grains, but just as an example here’s what one of those will look like:
1 |
|
You should notice in the above that we introduce a ReadOnlyDictionary
with the thresholds for degraded and unhealthy, then passed that ReadOnlyDictionary
to the data
parameter of the static method within HealthCheckResult
.
The only thing left to do is test it out! You may have seen the cover image which contained spoilers, but just to wrap things up, here’s what it looks like when hitting the “/health” endpoint after our changes:
In this guide, you’ll find some handy tips to help you hire and retain tech employees. Besides, we’ll also show you how to maintain your current staff up-to-date with the current trends.
When you’re hiring a tech professional, you may think the most important factor is education. People usually put education as their main priority. However, in today’s world, there’s no need to have a bachelor’s degree in computer science to be a killer developer, for example. Many high-level software developers were self-taught, and others didn’t even go to college.
Coding bootcamps are very popular these days, and they’re usually focused on employment, so don’t be surprised to see how prepared bootcamps graduates are. When creating a list of requirements, try to be more flexible. Instead of asking for a bachelor’s degree, opt for experience. Usually, their experience will tell more than their education.
Remember that the tech world is usually a remote working environment. Depending on the type of professional you’d like to hire, you can consider recruiting a remote worker if you have a strong candidate. You shouldn’t limit yourself to hiring tech workers from a specific location since you have a vast pool of talent on the Internet.
Even though it sounds like something irrelevant for most companies, the lack of career development is one of tech workers’ major reasons for leaving a job, according to a recent LinkedIn report. In this survey, we can see that more than a third of Millenials expect their employers to provide career development.
Therefore, it would be a good idea to offer career development to tech workers. You don’t necessarily need to pay for a college education. Even a coding bootcamp would count as they’re leveling up their skills.
It’s no secret that tech workers have a good salary. According to the Bureau of Labor Statistics, the average tech worker makes up to $88,240 annually. This wage is high compared to other sectors in the job market. Therefore, most of them expect to have good compensation at work, so if you’re trying to recruit tech talent, keep this in mind.
However, it’s also important to consider that benefits are usually more relevant for them than compensation. So if you offer them work-life balance and career development, they might think about it when deciding where to work.
Tech tools and hardware do matter. Think about this when you’re trying to attract tech talent. They’d be more productive when working with the right tools. Otherwise, they won’t feel valued. Companies that continue to have outdated equipment aren’t as appealing as those that have up-to-date tools.
This is particularly important when it comes to tech workers because technology is constantly evolving. If you want your company to succeed, you’ll have to invest in the latest tech trends.
Another thing you can consider is reskilling your workers. Many of your employees are probably willing to reskill themselves so they can continue to be valuable to your company. This is also beneficial for you because they already know the dynamic of your company. Here are some of the best online bootcamps you can use to reskill your employees:
Thinkful: Thinkful has a variety of bootcamps that can be beneficial for all companies regardless of their niche. Its courses cover product management, data science, software engineering, UX/UI design, and more. This school has a good reputation and flexible payment methods.
Flatiron School: This school offers different courses that are helpful in any business. Flatiron School’s bootcamps range from cybersecurity and software engineering to data science.
General Assembly: General Assembly is another great school that teaches relevant tech fundamentals like digital marketing, visual design, and front end and back end development.
Work-life balance is another relevant aspect that most tech workers consider when choosing a company. As we mentioned before, benefits are usually more important than compensation for tech workers since they typically have a high salary. Work-life balance means they can work productively while still having time to live their lives and enjoy their spare time.
One of the best ways to offer work-life balance is to allow them to work remotely at least once a week. They’ll continue to work, but they’ll do it from the comfort of their home. Besides, most tech workers only need a laptop and software to perform their tasks.
It’s also essential for you to start building your brand as an employer. This way, tech workers will easily find information about your company so they can decide if you’re a good match. To do this, you should create a profile on review sites like Indeed and Glassdoor.
You can add some information about your company and the perks of working for you. Besides, your employees can also leave their opinion about you as an employer. This will give tech candidates information about your company’s background and other things like workplace culture.
Hiring tech talent is essential these days if you want to succeed in your industry. It’s a very competitive task, but if you do the right things, you’ll be able to attract the best candidates and retain them in your company. Remember to provide them with the right tools and offer them career development to make them feel they can grow in your company. And don’t forget to build your brand as an employer!
This has been a guest post (my first one!) from:
Artur Meyster
Founder of Career Karma
Health Checks are generally exposed via HTTP endpoints, and when hit (often at a “/hc” or “/health” endpoint) they are able to report of the “health” of the current system.
The health checks, at least in .net land, are comprised of an enum HealthStatus which indicates Health, Degraded, or Unhealthy. The health checks themselves are created by implementing concretions of the IHealthCheck interface.
Any system can include one or more health checks, and what “a health check” means is completely up to you as the implementer. You could as an example have 1 health check that “checks”:
All contained within a “single” health check called “muhSystem” (or whatever), or you could implement the three above “checks” as their own individual health checks; so a single check vs multiple checks, all of which represent “the same thing”. Why would you choose one over the other? Well, going the single check route allows you to check on Foo
, Bar
, and Baz
es health, without “leaking” any information about what’s being checked. This sort of check could be useful if you needed to be careful about revealing information on some of the internal workings of your system.
In the “three separate checks” scenario, it might not matter to you if you leak some information about your system, you want to give your users (or perhaps your watchdog) information on a more detailed level.
We’ll be starting the code section of this post from the v0.58 tag on my OrleansGettingStarted repository.
I did not write a blog post about the changes that were performed in the update to the v0.58 tag, but one of the changes was getting the silo host running under the next UseOrleans
extension method. In the newer version of .net core and Orleans, you’re able to host multiple “processes” from the same IHostBuilder
. What this allows us to do is host a small API that will serve the health check endpoint through http requests.
First thing we’ll do is add a default web host to our host builder - which after the change will be hosting both our silo host, as well as our api:
1 |
|
(Note there are going to be other varying changes that I may not be specifically calling out, but the end code is here and in the references at the bottom of the post.)
We’ll also introduce a Startup
class:
1 |
|
The above class should more or less be the “default” Startup
class present when creating a new web API project from template.
The first health check we’re going to do will be a basic one - in fact that’s what we’ll name it. For this health check, we’ll use an IClusterClient
and ensure it can get an instance of a grain, and get a result from that grain. If it can get a result from the grain the health check should return “Healthy”, otherwise “Unhealthy”.
As always, we first need our Orleans grain interface:
1 |
|
The above is quite simple, we’re creating a class that implements both a IHealthCheck
and IGrainWithGuidKey
. IGrainWithGuidKey
should be familiar from some of my other Orleans posts, and the IHealthCheck
grain was mentioned earlier in this post, it’s an interface that describes a health check. We’re not adding anything to this interface that isn’t already provided via the IHealthCheck
or IGrainWithGuidKey
.
Our basic health check grain implementation looks like this:
1 |
|
That’s it! Just return a healthy result. If our actual IHealthCheck
implementation is unable to get an instance of this grain and an exception is encountered, the exception handler will return “Unhealthy” for us.
Now that we have a health check grain, we’ll need an actual IHealthCheck
implementation that will utilize our newly created “health check grain”. I know we’ll be creating several health checks here, all of which do “a lot of the same thing”, so this seems like the perfect opportunity to introduce an abstract class OrleansHealthCheckBase
:
1 |
|
All of our health checks will depend on a connection to the cluster, so the above will take in a IClusterClient
, and ensure the cluster is initialized prior to proceeding with the to be implemented actual check.
As I mentioned previously, for our “Basic” health check, we’ll just be checking that we can get an instance of a grain, and return a value. Such a health check will look like:
1 |
|
Now that the basic health check is out of the way, we can implement some more meaningful ones. The following health checks require a registered IHostEnvironmentStatistics
(which you can find out more about here).
These health checks will be especially useful for gauging the utilization of an Orleans node over time, which would allow you to make decisions on questions such as “should I spin up or down additional nodes for this cluster?”. Answers to such questions, especially if running your Orleans cluster in a k8s environment, are much simpler when you have performance metrics exposed via a health check endpoint, and are making use of a watchdog.
Going to go through these fast, they should be mostly self explanatory but you can view the completed code for anything I don’t specifically cover.
1 |
|
New grain interface, new grain implementation for CPU health checking. We’re going to return Unhealthy if above 90% CPU, Degraded if above 70%, Healthy otherwise.
Same basic idea for the memory health check, again making use of our registered IHostEnvironmentStatistics
:
1 |
|
In this case, I’m going a slightly different route and returning “Unhealthy” if the memory information cannot be determined, this should probably be consistently done between this and the CPU health check, but I wanted to show how you as the implementer is able to choose what “Healthy” vs “Unhealthy” means. For this memory health check, we’re unhealthy if above 95% memory utilization, degraded if above 90, healthy otherwise.
Now that we have our health check grains, we’ll introduce new IHealthChecks
very similar to the BasicOrleansHealthCheck
which extended OrleansHealthCheckBase
.
1 |
|
Now we need to wire all of these health checks up to our “/health” endpoint within our webhost. Luckily, this is pretty easy. The earlier Startup
:
Becomes:
1 |
|
The difference being we’re adding the health checks (and giving them names) within ConfigureServices
, and mapping the health checks to a “/health” endpoint within Configure
.
Let’s fire up the silo, and test this thing out!
Well, that was pretty anticlimactic… we’ll have to see about prettying up that health check response, hopefully in another post that I’ll totally write real soon!
I’m mostly a backend-dev. The bit of front-end dev I’ve done was on web-forms with asp.net. Getting started in this whole ecosystem seems pretty daunting coming from a background where I have access to strongly typed, easily testable code.
This is probably rehashing things I’ve stated before, but with front end I feel like it’s more of an “opinion” on if something is implemented in an “good” way.
Anyway, I’m trying to mess about with React. I want to hopefully at some point, replace the mostly placeholder site I have at kritner.com, with something a bit more substantial.
The first thing I thought would make sense to get started with is a general shared layout for pages.
I’ll be making use of Code Sandbox for my experimentation. Code sandbox, if you’ve never used it, allows for a playground (or sandbox…) for putting together sample apps with varying tech stacks like React, Vue, with or without TypeScript, etc.
Starting out with the template React Typescript. First thing I’ll do is introduce a few page stubs that my navigation will link to:
About.tsx
1 |
|
Contact.tsx
1 |
|
Home.tsx
1 |
|
In the above I’m utilizing function components, rather than class components https://reactjs.org/docs/components-and-props.html#function-and-class-components as they seem to be preferred unless otherwise needed; they look a lot simpler as well.
Not sure if this is the best place to introduce routing (I’d guess not), but not knowing a whole lot about the conventions/standards of React yet, this is what I’m going with. I’m going to update the App.tsx
to include routing.
The starting code for App is:
1 |
|
For routing, I’ll pull in the “react-router-dom” package into code sandbox:
We’ll now add routing to our App component, which supports URL routing. first our imports (there are a few extra that we’ll be getting to):
1 |
|
I’ll be making use of BrowserRouter, Switch, and Route for the URL routing. The App component will need to be updated to route to our earlier created “Home”, “About”, and “Contact” components.
1 |
|
The above should look pretty straightforward, though the “exact” on the root route seems to be necessary, at least in the order I have the routes defined. It seems that “/contact” matches first on “/“, and would show the Home component rather than Contact, unless the exact is specified (or if the “/“ is the last route defined).
Now the application should be responsive to the routes defined above:
Next to handle link based navigation, we’ll make use of Link.
1 |
|
The full App.jsx
now looks like:
1 |
|
I tried playing around with some of the routing portions being their own component, but was getting errors around trying to include things outside of a router. I’m guessing this can still refactored a bit, and am curious how others do it!
Obviously the above has no styling or anything of that nature, which is something else I need to learn more about ^^
References:
]]>The main thing accomplished in the previous post was getting a CA up and running with a client certificate signed by that CA. We updated our web api to require client certificates, and successfully connected to the application using our new client certificate.
The flaw in the previous post was though we were validating a client certificate was present, we weren’t actually validating that the client certificate was signed by the CA we created. If the client certificate were valid for some other reason (like if it were signed by another trusted root CA on the system, like an actual internet CA) it would still “get in”.
So first things first, we need to show that this is in fact a problem. I’ve already described the problem, but how can we go about proving it?
Easiest thing IMO, is to just create another CA and client cert with the new CA. The web api should accept both the original “client” cert, as well as the “badClient” cert.
I’m going to do all the steps from the previous post for setting up the CA, including trusting our “badCa”. The reason this is being done has already been covered above, but just to reiterate, we want to show that any valid cert is currently getting in; where we want only valid certs from our intended CA to get in.
So now we should have the following:
It’ll look something like this if you’re inspecting the certificates:
Now all there is to do is hit our web api with both the “good” cert and the “bad” cert, and confirm we are in fact able to get output from both.
Just like previously, let’s make sure the web api is running with a dotnet run
from the “Kritner.Mtls” project.
Then hit the application first w/o a cert:
1 |
|
With the “good” cert:
1 |
|
With the “bad” cert:
1 |
|
You can see, as expected, the request w/o a client cert is rejected, and the requests with both the “good” and “bad” client certs get through. Now, we need to figure out how to go about restricting the app to only accept client certificates signed by our “good” CA
So first things first, we need to identify something about what makes “good” client certificate “good”, and what makes “bad” client certificate “bad”. If you inspect the certificates on your system, you’ll see there is an “Authority Key Identifier” as an attribute. This “Authority Key Identifier” on the client certificate matches the “Authority Key Identifier” and/or “Subject Key Identifier” on the CA that signed the certificate:
Apologies about all different CA labels and whatnot if you’ve noticed them in the screenshots, I’m switching around computers like a madlad!
In the above, you’ll be able to see that the “good” cert “belongs” to the “good” CA, and the “bad” cert “belongs” to the “bad” CA - this is the information we need! Now we just need a way to get to the information in code.
Note the starting point of the code I’m working with is https://github.com/Kritner-Blogs/Kritner.Mtls/releases/tag/v0.9.1
Let’s review the current code within Startup
I even left a little note for myself and others from the last post:
1 |
|
Let’s introduce a service into this section of code, its abstraction will look like this:
1 |
|
In the above abstraction, we’re taking in a client certificate, and returning whether or not it’s valid (obviously). the context
within OnCertificateValidated
has access to the ClientCertificate
and it’s already in the form of X509Certificate2
.
Let’s stub out our implementation:
1 |
|
The above is obviously just a “starting point”, where we’re always saying its valid. We’ll wire it up by registering it as a service, and plugging it into our OnCertificateValidated
. The writing up of the services I’ve covered several times in other posts but if you need help, take a look at the finished code (TODO put a link here… if I miss this on my review, there’ll probably be a link at the bottom).
1 |
|
Above, we’re getting an instance of our ICertificateAuthorityValidator
once the client certificate is (otherwise) validated, then running out additional validation procedure on it. If the validation fails, it will mark the validation as failure, otherwise it will still be successful.
With our stubbed implementation returning true
from IsValid
, let’s see what that looks like:
Changing the stubbed implementation to return false
from IsValid
:
Now we can work on our actual implementation of the CertificateAuthorityValidator
. You’ll recall that we can (hopefully) rely on the “Authority Key Identifier” to ensure only our intended CA’s signed certificates can make it through validation.
Shall we do some debugging?
The screenshot above shows that the information we need is in fact present in the data presented to us from the X509Certificate2
. To save a bit of time and writing, know that the “raw data” on this extension does represent the same value on the CA cert, but there’s a few additional bytes of information, namely “KeyID=” (as seen in the screenshots earlier). I could not actually get this data from the bytes to confirm (tried getting the byte string as ascii, utf8, and several others), but that’s what it seemed to be. This means for our implementation, we need the “raw data” from this extension, minus a few of the first bytes to account for what I can only assume is “KeyID=”.
The full CertificateAuthorityValidator
:
1 |
|
Should be relatively self explanatory what’s going on in the above, but here’s the breakdown:
clientCert.Extensions
until finding the one with a “Friendly Name” of “Authority Key Identifier”It’s now time to check our work! Run the app if it’s not already running, and let’s check if we can get information using our good certificate:
1 |
|
1 |
|
What is TLS? TLS, or Transport Layer Security, is the successor to SSL; both of which are means of secure communication. There have been several versions of TLS, each subsequent version being more secure, easier to use, or a combination of the two. We’re up to TLS v1.3.
You can read a lot more about TLS here.
The basic idea of TLS is to secure communications between multiple parties, you’re probably very used to “seeing” it when you visit websites like this one.
There’s a lot of “magic” going on when connecting to a website, in the form of back and forth between client and server. The link I posted about goes into greater detail regarding this, but we can also pretty easily see some of it using a cURL command.
We’re going to use a testing web api project for this post, I’ll start it with:
1 |
|
Now run the project with dotnet run
, and submit a cURL command to the default WeatherForecast controller:
1 |
|
You’ll notice in the above that we’re using the --insecure
flag in our cURL command as we’re using a “development” certificate through the web api to establish secure connections.
So now that we’ve established a very high level of what TLS is and what it looks like, what is mTLS?
From Wikipedia:
Mutual authentication or two-way authentication refers to two parties authenticating each other at the same time, being a default mode of authentication in some protocols (IKE, SSH) and optional in others (TLS).
By default the TLS protocol only proves the identity of the server to the client using X.509 certificate and the authentication of the client to the server is left to the application layer. TLS also offers client-to-server authentication using client-side X.509 authentication.[1] As it requires provisioning of the certificates to the clients and involves less user-friendly experience, it’s rarely used in end-user applications.
Mutual TLS authentication (mTLS) is much more widespread in business-to-business (B2B) applications, where a limited number of programmatic and homogeneous clients are connecting to specific web services, the operational burden is limited, and security requirements are usually much higher as compared to consumer environments.
There’s a fair amount of information in the above, but the tdlr in my opinion is:
What this means is that application access can be controlled to our system through our system generating “passwords” for our users to use, in the form of certificates signed by our CA, that we provide back to them.
Note (I’m going to make it several times throughout the post) that the code is not set up in a way to verify that the client provided cert was signed by our CA, just that it is signed. This is not desired behavior, but I will try to handle the additional auth in another post. Additionally, you will often want to set up another layer of security than just the cert, dual auth of some sort provided by a one time password or something similar. This will help protect your system in an instance where a client’s cert/private key has made it out into the wild; without that “second factor” users won’t be able to get in (also not covered in this post).
Update: Setting up mTLS and Kestrel (cont.)
mTLS, at least in the way we’re going to set it up in this post, has a few steps, many of which are outside the bounds of “coding”. A high level list of steps includes:
I followed this tutorial: https://deliciousbrains.com/ssl-certificate-authority-for-local-https-development/
1 |
|
Now install the crt as a trusted root authority by double clicking it and “install cert”:
create a file client.ext with the following information:
1 |
|
Now generate the client key/cert:
1 |
|
You should now have a client.crt available, and when viewing, you should be able to see the “full certificate chain” in that the certificate was signed by the myCa (kritnerCa in my case):
It’s pretty straight forward getting mTLS working with Kestrel, a bit more involved with IIS (which I may cover in another post…?)
Add to the project file a NuGet package that allows for client certificate authentication:
1 |
|
We’ll be adding “Require Client Certificate” to our application bootstrapping in the Program.cs
:
1 |
|
Then in the Startup.cs
, we’ll need to update ConfigureServices
and Configure
to set up the authentication and register the authentication middleware.
ConfigureServices
:
1 |
|
Please be aware of the comments in the above code block. If you do not implement your own validation to go on top of the normal cert validation, then any valid certificate passed in from the client will be allowed, regardless of whether or not it was signed by the CA we created earlier in the post. I’m not going to cover writing such a validator in this post, but I’ll try to remember to do so in another; this post is taking me more time than I had intended already!
Update: Setting up mTLS and Kestrel (cont.)
Configure
:
1 |
|
Note the above app.UseAuthentication
should be done after app.UseRouting();
and before app.UseAuthorization();
. The whole Configure
method now looks like this:
1 |
|
Now we have mTLS set up in regards to our system, and our code. Let’s give it a run!
First, start the web application.
Next, let’s try our same curl command we used in the beginning of the post:
1 |
|
which looks like:
The above makes sense, we haven’t provided a certificate to the web application, so we are being rejected.
Now let’s make sure we can actually get in with our signed cert, using the following command:
1 |
|
which looks like:
it works!
Though the builder pattern is not my most used creational pattern (that’s the Factory), it is one that I often rely on for the creation of more complex objects than what the factory easily allows for.
From Wikipedia:
The builder pattern is a design pattern designed to provide a flexible solution to various object creation problems in object-oriented programming. The intent of the Builder design pattern is to separate the construction of a complex object from its representation. It is one of the Gang of Four design patterns.
I can’t think of an exceedingly straight forward example that truly shows of the power of the builder, but I am going to throw something together as a demonstration. Also note that a lot of the .net core app bootstrapping works around the concept of a builder, IHostBuilder comes immediately to mind.
1 |
|
The above shows a bit of what the pattern can accomplish, but keep in mind this is going to be nothing like what the IHostBuilder
will give you access to from the framework.
Let’s break down one of the similar methods exposed by the interface: IAddressBuilder WithAddress1(string value);
. This method takes in a string value
and returns an IAddressBuilder
. What does that mean exactly? That means it exposes a fluent api!
Wait, what’s a fluent api? Fluent APIs allow for “method chaining”, which can look like this:
1 |
|
Because each “non build” method within IAddressBuilder
returns an IAddressBuilder
that allows for the “chaining” of method calls on the builder as seen above, finally culminating in the built IAddress
when .Build()
is called.
1 |
|
The above should be pretty straightforward looking, the only thing to me that seems “weird” if you haven’t seen it before is the return this;
within all the With[x]
implementations. The return this;
accomplishes the method chaining discussed earlier in that “the instance (this) is returned from the method, and can immediately be invoked again”.
Here’s an example of it running:
It may not be immediately obvious why you would want to use this pattern, so hopefully this section will help shed some light!
IStateValidator
, it could be utilized when setting the state (or as a Build()
step)this
return a copy of the instance, then you can continue with a singleton scope.The docs on IHostBuilder
are a good place to start if you’ve not worked with it before - though if you’ve found this post I’d imagine you have and are having the same struggle as me!
The idea of the IHostBuilder
is the place where you “set up” all the startup bits of the application - the “services” that are a part of it like WebHost, Orleans, Logging, IOC configuration, etc.
Here’s an example of what it can look like:
1 |
|
The above should be pretty straight forward, though I am setting some things “again” that the CreateDefaultBuilder
has already set - like logging and the loading of app settings, for example. What is the issue with the above? Well in my case, I needed a way to be able to change the port the web host was running on, depending on the environment.
There are ways to accomplish this with environment variables, as well as variables passed in the args
at application run, but I wanted to do it via configuration files. I needed a way to get configuration files “loaded and accessible” during the ConfigureWebHostDefaults
.
First, we need a class that will represent our configuration, I’ve gone over a bit of this before in dotnet core console application IOptions configuration; see that for a refresher if needed.
The POCO:
1 |
|
The appsettings.json:
1 |
|
The appsettings.prod.json:
1 |
|
In the above, sure we could have just use a “root” level property in our config, but I like doing it this way for getting a strongly typed IOptions<T>
, as well as demonstrating the fact you could do this with multiple properties via the strongly typed configuration object within your application bootstrapping.
So, why can’t we just do what we usually do and either inject the IOptions<T>
or get the service from our IServiceProvider
? The problem I was running into is the place where I’d need the MyWebSiteConfig
- under ConfigureWebHostDefaults
from the intro, has not yet actually “built” the configuration by ingesting the config files via ConfigureAppConfiguration
nor set up the services via ConfigureServices
. This can be confirmed by placing breakpoints in each section (ConfigureWebHostDefaults
, ConfigureAppConfiguration
, and ConfigureServices
) and observing that ConfigureWebHostDefaults
is the first breakpoint to hit, well before the things we need from configuration are actually loaded.
My initial thoughts were to just create two HostBuilder
s, one to load the settings I need, get an instance of my MyWebSiteConfig
and pass it into a new HostBuilder
that will do (some) of the work again, but this time I’ll have access to what I need.
This seemed to work, aside from the fact that I got a few warnings that stated something to the effect of “don’t do this cuz singleton scoped things will be weird” - I don’t recall the exact warning (or was it error?), but I immediately went on to find another way to do it.
Thankfully, I found something promising IConfigurationBuilder.AddConfiguration. This extension method allows for that adding of an IConfiguration
onto an IConfigurationBuilder
. What does this mean? It means that I can do almost was I was working toward from “the problem” above, but rather than two separate HostBuilders
, we’ll use two separate IConfiguration
s.
So what does our first IConfiguration
need to be made up of? We know we at least need the app settings files loaded, and a service provider that can return an instance of our MyWebsiteConfig
. That looks like this:
1 |
|
In the above I’m returning a named tuple with a env
, configurationRoot
, and myWebsiteConfig
. Much of this should look familiar:
IConfigurationRoot
by building the tempConfigBuilder
MyWebsiteConfig
IServiceProvider
from the IServiceCollection
IServiceProvider
env
, configurationRoot
, and myWebsiteConfig
Now that we actually have an instance of MyWebsiteConfig
, we are able to build our configuration dependent IHost
:
1 |
|
In the above, we’re doing a lot of the same things as before, with just a few additions. First, our method signature is now receiving in addition to args
, the three items from our named tuple. We’re able to add our existing configurationRoot
onto the IHostBuilder
, as well as set the environment. Now, we are able to utilize our myWebsiteConfig
without having to worry about the ordering of the builder methods of IHostBuilder
, since we already have our instance of MyWebsiteConfig
prior to entering the method.
Here’s what it all looks like:
1 |
|
Running the app and breaking on the UseUrls
line you can see:
Code for this post can be found: https://github.com/Kritner-Blogs/Kritner.ConfigDuringBootstrapNetCore
At my job, I find I’m using creational patterns constantly; and most of the time it’s a factory.
In class-based programming, the factory method pattern is a creational pattern that uses factory methods to deal with the problem of creating objects without having to specify the exact class of the object that will be created. This is done by creating objects by calling a factory method—either specified in an interface and implemented by child classes, or implemented in a base class and optionally overridden by derived classes—rather than by calling a constructor.
From Wikipedia
This pattern is very related to the strategy pattern - at least as far as I’m concerned. In the previous post on the strategy pattern we learned that you can use multiple implementations of a single interface as differing “strategies”. In the post, we were deciding based on some pretend run time situation of which strategy to use:
1 |
|
The above could be an example of the application choosing a strategy based on some run time input (the value in args[0]
).
Why is the snippet a problem? It probably won’t be the first time it happens, and when your codebase is very simple. As your codebase evolves however, and you get perhaps more places where you would want to instantiate a ILogger, and more ILoggers get added, you start needing to update more and more code. What do I mean by that? Well, imagine you added this “if/else” logger logic to 50 additional files. That if/else logic now exists in 50 files!
Every time a “branch” occurs in code, that makes the code harder to understand. This may be only one simple 4 line set of instructions, with a simple to follow branch, but what if this same sort of situation were throughout your codebase, applying to more than just an ILogger
?
What if, even worse, you add a MsSqlLogger
, and a MongoLogger
to your possibilities of loggers, now you have an if/else branch to update in a hypothetical 50 files; that’s no good!
How can we avoid some of this hassle? The factory method to the rescue!
We’ll be using the same ILogger
strategy and implementation from the previous post as a base line. The few additions are:
1 |
|
That’s it for the “abstraction“ part of our factory. Now the implementation:
1 |
|
and a (bad) example of how to use it (since we aren’t for this example using dependency injection like we should in the real world):
1 |
|
How does the previous section actually help us? If you recall, in our hypothetical scenario our original “if/else” branching logic occurred in 50 files. We needed to then add two additional strategies, meaning we needed to update 50 files. How did the factory help us? Well now, that branching logic is completely contained within the factory implementation itself. We simply add our MsSql
and Mongo
values to our enum, and add two new case statements to our factory implementation - a total of 2 files updated, rather than 50.
This not only saves us a ton of time, it help ensure that we don’t miss making updates in any of our 50 files. One additional thought is the factory itself is very testable. It’s easy to test all the “logic” that’s involved with choosing the correct strategy, because all of that logic is completely contained within the factory itself, rather than across 50 files!
I’ve not been having as much time to focus on writing as I’d like, so I figured I’d try to knock out some pattern review for myself while hopefully working on more significant posts in the background. The first post in this potential series of posts - The strategy pattern!
In computer programming, the strategy pattern (also known as the policy pattern) is a behavioral software design pattern that enables selecting an algorithm at runtime. Instead of implementing a single algorithm directly, code receives run-time instructions as to which in a family of algorithms to use.
from Wikipedia
What does that mean? Well to me, it’s just having multiple implementations of a single interface. That’s it. One of the first things I think about when it comes to the strategy pattern, is having multiple “Provider” implementations for something like logging.
1 |
|
That’s our interface. There’s not much to the contract. We have a method called Log
which expects a string
message.
So how does this get utilized as a “strategy”? Multiple implementations!
1 |
|
(Note, don’t use that file logger, it’s terrible… In fact! don’t use any of it, it’s just an example!)
1 |
|
What does the use of this pattern buy us?
ILogger
rather than a concrete implementation - making Unit testing easier.Note that I got some pushback in a programming slack group that the above is not in fact an example of the strategy pattern, due to not having selected the implementation at run time (since I did it in code at compile time). I disagree, but wanted to throw that out there cuz I’ve been wrong before! :D
The code for this pattern can be found on my pattern repo: https://github.com/Kritner-Blogs/Kritner.PatternExamples
Resources:
I don’t seem to have a lot of time for learning. My expectation is that there will be more time available to me as the kids get a bit older (currently have a 6 month old and 3.5 year old.)
When I do have free time, I struggle with what I should focus on. Here are a few of the things I would like to do, not necessarily in any order of priority:
Ideally, I’ll get to all of this eventually, but how do I get started? I guess writing this post is somewhat a step in the right direction, at least to get a list out there.
Several years ago, when I had almost all the free time in the world (pre-kids :D) I did a lot of reading. I would always alternate between a fiction book, then a non-fiction book. Generally the non-fiction book was either a programming/technical book, self-help, etc. The fiction book was usually always cyberpunk or fantasy.
I suppose something like the above would work, just seems like everything is such a time commitment, and if I don’t get through one “thing” in a week (using a plural sight course as an example), I’m not sure I’d retain enough to have made use of the time.
My weekdays, I feel like are completely shot, but perhaps having it in a list will help me find points of opportunity.
How do you make time for your continued learning? All the while, keeping in mind, you obviously have to make some time for yourself. You can’t spend all of your free-time head down learning, seems like a good way to go crazy, no?
Should I try to alternate between things on my list? Concentrate on one? Curious what others do!
Some Code:
1 |
|
This will hopefully be a short and sweet post, just wanna put this out there as a reminder, and to help someone that may just not realize much about testing changes with CORS.
Let’s create a new .net core 3 API with the command:
1 |
|
Now let’s run it with dotnet run
and see what we’re working with:
CORS being ‘disabled’ by default is the safe thing to do, you don’t necessarily want any other website to be able to access your API on a user’s behalf, some nefarious deeds could potentially occur. You can read more about the background of CORS here. All that being said, here’s how to do a blanket allow all origins.
From the Startup.cs
page, which should currently look like this:
We’ll want to make a few updates.
In the void ConfigureServices(IServiceCollection services)
method, we’ll want to add a CORS policy:
1 |
|
and within public void Configure(IApplicationBuilder app, IWebHostEnvironment env)
:
1 |
|
That’s all there is to it!
Now to test our fancy new CORS header (here’s where I ended up having issues)… Let’s run our app again through dotnet run
and hit our weatherForecast endpoint with Postman:
Hmm. There’s no CORS header. This is actually expected (maybe for people that have worked more closely with HTTP headers). The CORS header is only present when needed - when the request is being done on behalf of another website, another origin.
We can update our postman get request to contain an “Origin” header which will make our request look like it’s coming from a website, at which point the CORS header will be present:
There are many options you can do with the CORS header, obviously you should not allow ALL origins as I did in my example code, unless that’s something you need. You can very easily restrict it to specific domains.
That’s it, CORS headers on your .net core 3 API, and how to confirm the header!
Full code (although not much) can be found:
https://github.com/Kritner-Blogs/dotnetcoreCors/releases/tag/v1
]]>Having an issue under https://github.com/thepracticaldev/dev.to/issues/3995, just attempting to make sure I can get posts with code to show up under drafts.
1 |
|
Here’s a recipe(ish) of a few different versions of ramen I’ve done, some more keto than others. Note, I don’t generally do measurements, I just add stuff til it tastes good.
Tare is the primary flavor for ramen, it’s always salty (as the broth is not salted), and flavored in varying ways. I generally go for a tare something like this:
all amounts are really estimates and to taste, it should be pretty salty on its own. This tare will be used for a few other steps of the recipe, so i might even make more than what’s listed above.
There are so many toppings that you can do with ramen, here are a few that I’ll generally do…
When doing the pork shoulder on the stove, when taken out after three hours, store with some of the (maybe half) of the tare, diluted with a bit of water. Store in fridge while broth continues to cook with chicken bones. The pork will be easier to slice thin when cold.
I’ll generally do these when working with the instant pot, and going for a more keto version.
That’s pretty much it.
I got lots of inspiration from varying recipes around the interwebs and cookbooks, specifically:
]]>I recently met with a few people from a non profit organization MAGIC, that I’m hoping I will be able to help out in some manner. They do a few major events throughout the year, as well as a cyber club that takes place at the local library. Most of their work is done in Python, so I figured I better familiarize myself a bit more with it.
It’s been a while since I’ve had much of a chance to do any blogging. We had another baby recently, and I’ve been super busy! Between the new baby, old baby, and work, I haven’t had much time or inspiration to do much of anything aside from stay alive.
MAGIC currently has (although from my understanding has not used) a python API for one of their events. I thought it would be a good opportunity to figure out how to build and host a python application using the same framework - flask.
Flask is described as:
Flask is a lightweight WSGI web application framework. It is designed to make getting started quick and easy, with the ability to scale up to complex applications. It began as a simple wrapper around Werkzeug and Jinja and has become one of the most popular Python web application frameworks.
With the little bit of code I’ve looked at around Flask, it seems to solve a similar problem that MVC and/or Web API solve from the .net world. I’d like to see what it takes to get a minimal flask application up, running, and hosted on the interwebs!
I’m only going to be using a hello world type application with Flask. In the future I hope to have a chance to further explore flask, and just python in general. From the tutorial on the flask site, I’ll be making a “app.py” with the following:
1 |
|
Flask is not resolving here, and that’s because I have not installed it yet. Working briefly with python before, I recalled using a virtual environment to house my project’s dependencies; hopefully that is still the standard.
From https://packaging.python.org/guides/installing-using-pip-and-virtual-environments/, I ran:py -m pip install --user virtualenv
, py -m venv env
, then .\env\Scripts\activate
.
Next, I defined a file called “requirements.txt” and added:
1 |
|
Now to install the requirements into the virtual environment:
1 |
|
This will install Flask, pytest, and all of their dependencies into the virtual environment created previously. Now the “flask” import is resolving from the “app.py” that was created.
We don’t really have much to test right now, but why not just throw a few stubs out there so that we have something to run when we get to the travis build coming up.
app_test.py
1 |
|
the function “func(x)” is a “hello world” type test I found when googling about pytest, and the second test “test_hello_world” tests the endpoint defined in app.py returns the expected string.
Next, we’ll run pytest
from the command line, and check that our tests are passing:
we can run the application with a python app.py
:
As stated at the beginning of the article, I’d like to have this application hosted on the internet somewhere, I’m going to use Heroku, since they have a free tier of hosting. Prior to getting to the hosting however, I’d like to set up Travis to test my application, even with its extremely limited functionality and tests.
I’ve used Travis previously for .net projects, so it couldn’t be that difficult to get set up for python, python isn’t even compiled! :D
So to get travis to run on our repository, we simply goto https://travis-ci.org, set up an account if we don’t have one, and “enable” the functionality for the repository we want to have tested with travis. In my case I want it to run against all PRs and commits. Next, we’ll need a .travis.yml file with the following content:
1 |
|
The above should be pretty self explanatory, although the “dist: xenial” is apparently required for the most up to date versions of python. We’re installing our requirements (flask and pytest), then running pytest.
Now, on commit and PR, travis will run out build, and test against our tests - this will give much better assurances that the incoming commit/PR didn’t “break” the build. This build currently looks like this:
Now that our project is building and being tested, we can set up Heroku to serve our website, and for free! The set up of a heroku account is pretty straight forward, and there’s lots of tutorials. You just need to point heroku to your github repo, then tell it to auto deploy pushes to master (note that travis CI ideally will fail builds to master if tests don’t pass, so we’re getting some level of assurance we’re not pushing “bad code”).
One thing I did not see from the tutorials I was finding, was information on how heroku assigns a random port to your application, and how to go about using that port from your flask app. After weeks (though this was just mostly passive time) of trial and error, I found out it was simply using a Procfile to forward the $PORT$
to my flask app as so:
Procfile:
1 |
|
which will get utilized in the app.py lines:
1 |
|
Where “port” (when defined and passed in by heroku) will be plugged in, otherwise the port 5000 is used. gunicorn was (at least) a recommended way to serve the python app, so that was an additional dependency added to my requirements. txt.
On the next build of the application, it successfully deployed to https://kritnerflaskhelloworld.herokuapp.com/. Note that with the free tier of heroku, apps will “go down” after a bout of inactivity, so the first few seconds after hitting the URL is just the application being brought back up.
I think that’s it! Code for this post can be found at: https://github.com/Kritner-Blogs/FlaskHelloWorld
]]>Just to start things off, the most simple thing. Hello world along with trying out VSCode w/ Java.
Most of these steps are from https://code.visualstudio.com/docs/java/java-tutorial - so this will be rehash of that, I just want to write it down as I learn better that way.
Oracle is undergoing some changes with licensing for the Java SDK(?) - I won’t pretend to understand that, but it sounds like utilizing the open JDK is the route to go.
Install VSCode from https://code.visualstudio.com. After installation, install VSCode extensions (Control + Shift + X):
Lastly, install maven - I’d like to use it from the CLI.
I need to get into how Java projects and the like work, but for now, a simple hello world should suffice for this post.
1 |
|
Control F5 that bad boy and then get the output!
Note I did initially have some VSCode output errors - one related to a missing classpath, and one was complaining about not being able to create a launch.json file.
The missing classpath appeared to be related to the fact that I’m working with a raw .java file, and the secondary error was resolved when I restarted VSCode /shrug.
Next time, I hope to be able to dive into some of the boilerplate and ceremony of Java, so that I can better understand how to get a project up and running from the ground up; or to modify an already existing project.
Photo by takeshi2 on Unsplash.]]>I’m starting this batch on 2019-04-03, plan on finishing it up in about 10 days (as per Brad from It’s Alive | Bon Appétit). This is my second round of fermentation; the first being a vegan kimchi. It was vegan mostly because I don’t care much for fish sauce, and my vegan SIL was staying with us. I thought it was damn good, and may document if I end up doing it again.
Anyway… I’ve always enjoyed kimchi when I’ve made it in a “fake” manner previously, just vinegared and with sriracha. The recipe I Frankenstein monstered together was so good, that I can’t believe I’d been missing this from my life for so long.
Mostly the basic stuff you’d see in a jar of pickles you’d buy from the store: coriander, dill, garlic, peppercorns, cucumbers; the only thing absent is vinegar.
In the case of lacto-fermentation, you rely on the bacteria lactobacillus to add the sourness to your food, rather than vinegar. We’ll be accomplishing that by just using salt, and water. With this sort of environment the food’s “good” bacteria like lactobacillus is able to thrive, where “bad” bacteria - the ones that cause food spoilage and food born illnesses, are retarded.
So the recipe:
Steps:
So uh… I ended up eating all of the pickles before I took any additional pictures. They didn’t really “transform” like the hot sauce did.
The pickles tastes pretty good, but I don’t think they ever really got “sour”, or even “half sour”. Perhaps on the next batch I’ll just try them at room temperature, rather than in the fridge. I didn’t really understand how the recipes I found did them in the fridge anyway, since I was under the impression putting anything fermented into the fridge severely slows the ferment process. The pickles tasted good, but just more like marinated salty cucumbers, rather than “sour”.
]]>Started the ferment on 2019-04-03, plan on letting it go 1-2 weeks.
I totally goof’d and bought entirely too few fresnos chillis, so my jar is looking a bit sad D:
Ingredients:
Steps:
I added more brine as well as red bell pepper, and additional fresnos. The jar was little a little too sad. Hopefully now I’ll have a bit more of a substantial quantity of end product!
I checked on the peppers once or twice a day, gave them a swirl and massage. The peppers were really tasty! They definitely had a fair amount of sour to them, and a bit of an effervescence.
This is what the bubbles looked like on the last day when I would jostle the jar:
On the last day, I had a bit of a scare (this is mostly the reason I ended the ferment when I did) in that I thought I may have some mold forming, after the jar jostling settled, I was presented with:
Doing some googling, it SOUNDED like what I was looking at was yeast; it was described as “thready” where mold was described as “fuzzy”. Some sources said that white mold can be “ok”, but any other colors than white to throw out. I took a gamble that this was yeast, and it’s been a few days since I ate the peppers, and I haven’t died - so hopefully I was right!
The actual hot sauce, after blending it, didn’t turn out exactly as I hoped. I blended it for a good 3 minutes with a bit of the fermenting brine, but its consistency was a bit off, I could still feel little bits of the peppers skin. I thought the solution was to add a bit more brine, but I never did get rid of that texture. Once straining through a cheese cloth and colander, I was left with a hot sauce that had more of a consistency of tabasco, rather than sriracha; I was hoping more for sriracha.
The hot sauce definitely tastes good enough, it just wasn’t thick enough for me. Perhaps next time I’ll try to take the skin off the peppers prior to blending.
The finished product:
Next I’m doing saurkraut! om nom nom!
]]>A Canonical link is used when similar content exists in “more than one place” - be it in the same website, or somewhere across the internet. The canonical link is used in order to tell search engines that “this content is duplicated from somewhere, and this somewhere is the original source”. It’s important to use canonical links for content that exists in multiple places, as it benefits your Search Engine Optimization (SEO) in that you aren’t punished for, or competing with, your own content hosted in multiple places. SEO is important as it helps drive traffic to your site.
It was stated above that you can use canonical links as to not compete with your own content hosted in multiple places - and that’s the biggest reason I’m doing it. When not using canonical links, your search engine relevance can take a hit as there is “duplicate content” out there, potentially hurting all occurences of said duplicate content from a search engine perspective. With a canonical link, it is known that it’s not duplicate content, it’s just hosted in multiple places, and the search engine is smart enough to understand this fact, and not punish you for it.
I’ve gone through various blogging platforms through the years:
In all of the above cases, I would generally write a post in one place, then within a few days or weeks cross post it to another platform, making sure to utilize a canonical URL to point back to the platform in which I originally posted the content. Going this route allows me to keep my primary blog platform (at the time) as the “original source of truth”, but also allows me to get additional exposure by cross posting to other places (medium, dev.to), all of which have their own internal content distribution networks.
Now that I’m moving over to Hexo, I am in the process of cross posting some of my posts from other platforms, to this one. This is probably the longest streak I’ve had with blogging, so I have a lot more posts to work with than previously, so I’m probably not going to do all of them, as I have in the past; but the ones I do do, I will be making sure to use a canonical URL!
Canonical links are luckily quite easy to employ! You simply place <link rel="canonical" href="https://myOriginalContentUrl" />
within the head of your page, that’s it!
One of the first things I needed to look into when moving over to Hexo, was how to specify the canonical URL, as I generally do some “back porting” of posts from my other platforms, to my new, just to have some content in there. I did not see a built in way to do this with Hexo/Icarus, though I’m sure there are plugins. Either way, I ended up submitting a PR to the Icarus plugin code repo, and got a very rudimentary implementation on canonical URL specifying put into the Icarus code base! :D
The Icarus specific canonical URL can be used by placing canonical_url: https://myUrl.com/
within your posts front matter, looking similar to this:
And what it looks like from view source:
Related:
]]>Dave (from https://davefollett.io/) and I were talking a bit about thumbnails, feature images, and our local vs deployed dev process in the coding blocks slack channel today. I discovered that a bit of research was needed on how to avoid changing config files when switching between a local dev and deployed situation.
The answer lies in numerous config files that can get merged together for local development…
My url
from _config.yml
was pointing to my actual domain of blog.kritner.com. This caused issues when writing a new post because of images I had intended to use like “hexo-logo.png” would have its full URL built out as [url]/[myPost]/hexo-logo.png
, which in my case would be https://blog.kritner.com/...
. The “URL” portion of my config file was being injected in, but since these images did not exist out on the internet yet, I was unable to confirm the image actually “worked”.
This led me to update my url
to “localhost:4000”. Now my images were showing up (when I spelled the image name right) but I now had to deal with another problem. I needed to remember to change my url
back to my actual domain of “blog.kritner.com”.
Poking around the hexo documentation I happened across: Using an Alternate Config. Going this route, I would be able to utilize multiple configuration files that get “merged” together, with the values further down the “chain” of configuration files taking priority.
With this in mind, I created a new config file:
_config.local.yml
1 |
|
That’s it… Now, we just need to use this file when generating and server-ing… as so:
1 |
|
In the above (which I put in a .bat file called “serveLocal.bat”) we’re saying use the “_config.yml”, THEN the “_config.local.yml” file when building and serving. This causes the “_config.yml”s url
property to be overwritten - going from “https://blog.kritner.com" to “http://localhost:4000".
Now, when developing locally, rather than running hexo generate && hexo server
, I simply run the “serveLocal.bat” file. When pushing to GitHub, which then kicks off a built to Netlify, the normal and original “_config.yml” file is the only file that gets considered under that build’s build step of hexo generate
.
One additional setting that almost immediately came to mind for the “_config.local.yml” file was render_drafts: true
. With this option in only the local config file, I can ensure that I’m able to view my drafts locally, while keeping them out of my deployed blog in instances where I want to check some drafts into my git repo - without having to remember to change configuration settings!
Today I explored working with multiple configuration files in my hexo development process. The full “_config.local.yml” that I’m using is:
1 |
|
I’m using a bat file for local generation and serving:
1 |
|
And note that a “_multiconfig.yml” file is automatically generated based on the merge of your configuration files for (I assume) easier debugging.
Hexo logo by: https://github.com/hexojs/logo
Related:
]]>Lately I’ve been thinking a bit about why I’ve been attempting to blog more.
There were a few reasons for my attempts to blog:
In the past few months, I feel like I have accomplished something from most of those points, except the make money part - but I thought that was just an added bonus either way.
Through Medium, I had received a few dollars here and there for my posts, but it did not end up covering the cost of the Medium membership, much less the additional cost of filing an additional tax form on the piddly income that came in.
I don’t have much time before I gotta get the toddler in the bath, so I’ll make this quick. I’ve decided to give Hexo a shot, and perhaps I’ll cross post to medium (but I will definitely still be posting to dev.to).
I’m waiting on a dev.to export so I can (hopefully) more easily migrate to Hexo; additionally I’ll need to update some canonical links everywhere.
Welp. That’s about it!
Oh… do code snippets work out of the box with Hexo?
1 |
|
Got some google analytics action going on as well.
More to come?! Hope so!
Hexo logo by: https://github.com/hexojs/logo
]]>Coming from a strictly relational db world, NoSql style databases have always seemed a bit scary! I recently had the opportunity to play around with MongoDb for the first time, and I was quite surprised by how easy it was to get started!
From wikipedia:
A NoSQL (originally referring to “non SQL” or “non relational”)[1] database provides a mechanism for storage and retrieval of data that is modeled in means other than the tabular relations used in relational databases. Such databases have existed since the late 1960s, but did not obtain the “NoSQL” moniker until a surge of popularity in the early 21st century,[2] triggered by the needs of Web 2.0 companies.[3][4][5]NoSQL databases are increasingly used in big data and real-time web applications.[6] NoSQL systems are also sometimes called “Not only SQL” to emphasize that they may support SQL-like query languages, or sit alongside SQL database in a polyglot persistence architecture.
Traditionally with relational databases you strive for as normalized of data as possible; tables with foreign key relationships more or less. With a NoSql database, it seems like doing a lot of that “design” around keeping your data structure is not as necessary — in a lot of situations you can simply get away with storing the entirety of the object in a single document.
Honestly, I don’t know much at all about NoSql style databases. I knew I had a potentially massive amount of varying “schema” json objects that I needed to store, and I needed to figure out a way to do it quickly. MongoDb is something I’ve heard of, as well as a few others that were thrown out: Cassandra, Raven, Redis, Couch, etc. A few of these were out of reach immediately, as it seemed that they were only available on linux — at least at a cursory look. Others it was difficult to find information or packages that would interface with .net core. MongoDb luckily has a community addition, installs on windows, and a .net standard based NuGet package that can be used with .net core — sold!
A straightforward tutorial on getting MongoDb up and running on Windows, as a service (or not) can be found here:
Install MongoDB Community Edition on Windows - MongoDB Manual
So now that that the database is installed, we can now proceed onto the traditional hello world application when poking around something new!
Let’s start a new application with .net core (SDK found here) using the command:
1 |
|
Next we’ll need a NuGet package that will allow us to work with MongoDb easily:
Now all that is left is to write a bit of c# code to try out MongoDb!
1 |
|
It could look like this when running (note I’ve run this a few times, and since it’s persisted data, the counts are incrementing each run):
Now that we’ve inserted data, we can query that data using c#, or take a look at it with some of the mongo tools that came with the installation — like the mongo shell or compass.
Here’s a sample of what the data can look like from compass:
From the above you can see the documents we’ve inserted via the console application are present, and that they exist in a database and collection that was created automatically via the code.
Hopefully the above helps show that it’s quite simple to get started playing around with MongoDb. Note that the above does not look at any security related concerns, so make sure to take that into account if you’re moving forward with MongoDb.
I’ve been working with a relational database for so long that NoSql seemed pretty intimidating, but getting started with it was a lot easier than I expected!
Related:
]]>Episode 21 - Orleans with Russell Hammett
Lately, I’ve been trying to blog more. In the past, I’ve blogged off and on, but I’ve had a *bit* more success with it lately; I’m hoping I can keep it up! My employer Huntington Ingalls Industries (formerly G2 Inc.) has had me on an awesome project for the past 2 years — a project where I need to learn more every day, and reinforce the knowledge I already have. Basically, I’m trying to say is I’m lucky to be working for a company that appreciates growth!
GaProgMan approached me (at least I think he approached me?) about the possibility of doing a podcast interview on Orleans; as he knew I at least had some cursory experience in it due to the blog posts I’ve written. After clearing it with the powers that be (my managers and NIST) — we scheduled the interview!
I wasn’t sure how much we would actually talk about the project in the interview, but I wanted to get it cleared either way. That episode has now been released and is available for your listening pleasure!
Doing a podcast was pretty scary for me, being a pretty socially anxious person. I’ve been trying to put myself out there more lately — with the blog posts, the game streaming, and the small amount of mentoring. I’d like to do more, maybe start teaching and/or twitch code streaming, to get me even more out of my comfort zone, and to work on that “muscle”; if that’s a thing that exists.
Since Jamie and I touched on the project I’m on, but not especially deeply, thought I’d cover a bit more of that here. I work on a project with NIST called the Automated Cryptographic Validation Protocol (ACVP):
In this project, we are working to create an API that will allow for the testing of your cryptographic algorithm implementations. Having your hardware/software/firmware used within the government requires this sort of validation (among others).
Since the beginning of the project, we knew that the “distribution” of our crypto calls to a cluster of compute would eventually be needed; as we expected to have to run hundreds to thousands of crypto calls for each validated algorithm. This had been researched for a while, and after proofs of concept around implementation and ease of administration, etc., we decided on giving Microsoft Orleans a shot. Orleans did not *exactly* fit our use case, as in the documentation it was stated that Microsoft Orleans was intended to be used for asynchronous code. Through research, blog posts in my own time, trial, and error, we have seemingly, successfully, implemented Orleans into our project.
So you can obviously find out more about Orleans through the series of posts I’ve done on the subject (among all the other resources out there), but just to elaborate a bit on what we’re doing with Orleans (as I haven’t specifically written about that):
That is the very basics of how we’re using Orleans, a (very) early proof of concept of what we were trying to accomplish with the separate scheduler can be found here:
Question/Sample Request: Long running function execution via Orleans · Issue #4826 · dotnet/orleans
Anyway, please listen to the episode yourselves! We are using Orleans in a very specific, non standard way, so I’m really hoping I didn’t screw anything up too badly! Jamie and I talk a bit about the project I’m working on with HII and NIST, and a whole lot about Orleans and tea!
Spoiler warning: My voice is a LOT nerdier sounding than I think it is :P
Related:
As a refresher, Orleans is a virtual actor model framework — a framework that can be used to build new, distributed “primitives”. These primitives’ work can be farmed out to a cluster of nodes as a means of getting “work” done faster than what would be possible if working constrained to a single piece of hardware.
In a previous post:
How to set up Microsoft Orleans’ Reporting Dashboard
I had pointed out:
Currently CPU/Memory usage is not visible from the .net core implementation of Orleans. Hopefully something will be done to remedy that in the future? Perhaps it’s a limitation of the API available in netstandard?
This seems to have been true at a point in time, but it is no longer! (At least if you’re running in a windows runtime.)
The additional CPU and memory metrics are completely dependant on a registered IHostEnvironmentStatistics implementation. By default, a “NoImplementation” implementation is registered, and you would see something like this in your Orleans log:
And this on your dashboard:
The whole reason I stumbled across getting these CPU/Memory metrics working on the dashboard, was I was pursuing getting the feature LoadShedding to work — which was apparently dependant on these metrics.
Through some back and forth on the Orleans Gitter I found out about the needed registered implementation of an IHostEnvironmentStatistics class. One of these classes does exist in the Orleans code, though it’s in a separate package, and an internal only class to that package:
Luckily, there is a SiloHost extension method that registers this implementation of IHostEnvironmentStatistics for use — albeit from a Windows only runtime environment (at least at the time of writing).
To get the CPU/Memory metrics work on our dashboard (and putting us in a position to work in LoadShedding) we need to do a few things:
The IHostEnvironmentStatistics implementation exists within the Microsoft.Orleans.OrleansTelemetryConsumers.Counters package, install it via the GUI, CLI, etc. The csproj file from the SiloHost project should look something like this when done:
As previously mentioned, the new NuGet package has a Windows specific implementation of IHostEnvironmentStatistics contained within it, although it is an internal class. There is however, an extension method that can be used to register that internal class.
Let’s update our SiloHostBuilder
:
Original
1 |
|
And we just need to add .UsePerfCounterEnvironmentStatistics()
.
Updated
1 |
|
That’s all there is to it! Now, we should get our CPU/Memory utilization reported on the Orleans Dashboard, and be in a better position to work in LoadShedding — perhaps for the next post!
Now, looking at our dashboard, we can see:
Now, we have even more insight into how our cluster is operating, and additional features such as LoadShedding are made available to us!
Docker is a method of building applications/infrastructure/code within a container; a container being a self contained piece of software with all dependencies needed to run an application.
Though not directly related to a build server, they do have some overlap in some of the problems they try to solve. When utilizing either docker or a build server, your build process and its dependencies need to be codified… in code. The idea is that you’re writing “docker code” in order to describe the steps to build and deploy your app. This is very similar to using a build server in that you can be sure that any developer or server will be able to build or run your application code, without the hassle of installing all of your applications dependencies, as those dependencies are referenced within the docker “code” itself. (Note, you still need to have docker installed, and there are likely a few other caveats, especially when it comes to injecting variables into your docker containers.)
The current image I’m using is quite small (code length wise), and due to that fact builds take longer than they should. This is due simply to the fact there are no real “checkpoints” in my build process. I’ll try to explain more about that while walking through my base image:
dnc2.1.401-v1-base
1 |
|
dnc2.1.401-v1-node
1 |
|
KritnerWebsite.DockerFile
1 |
|
KritnerWebsite.Dockerfile
based off of my other images, it’s not very flexible when it comes to upgrading which sdk I’m using. I currently need to update dnc2.1.401-v1-base
, rebuild dnc2.1.401-v1-node
, then rebuild my actual website image.GaProgManhas worked a bit with docker, and had a few tips for me with a multi-step build process he gave me a few months ago for reference (yes, I’m just getting to this now):
1 |
|
I don’t want to copy exactly off of GaProgMan’s sample, luckily he commented it very well, so I’d know what’s happening. The most important thing I’m shooting for is creating more layers. These layers are important for ensuring more things will be cached; so not rebuilt (necessarily) with every build of the DockerFile
.
First things first — I know I can cut down on my image size by utilizing two separate base images throughout the docker file:
Previously, I was using only the SDK, which blows up my final image size by quite a bit — my images’ current size is 2.23 GB as per docker images (yeesh!).
So for the two images — sdk and runtime:
1 |
|
In the above we’re running a few commands on the base images for the purpose of installing nodejs — which we’ll need both for building and running the angular app; at least I’m pretty sure it’s needed for both right?
1 |
|
Next, we’ll do the dotnet restore on the single copied project file — the reasoning behind this was pretty well explained in the above example, but I didn’t really realize it worked this way until seeing it in GaProMan’s comments. Basically, this restored “layer” can be cached, and never “rebuilt” unless something in the dependencies changes, saving on time when rebuilding our docker image!
1 |
|
Same idea in the above, but for npm packages instead of .net dependencies.
1 |
|
In the above, I’m copying the entirety of the buildable source directory, and performing a build with the .net CLI. Special note that the --no-restore
option is being used as a restore operation was performed previously.
1 |
|
Here, in a similar idea to the build layer, we’re performing a publish; making sure not to restore or build as both have already been completed.
Finally:
1 |
|
In the above we’re copying our built application from the publish image, into a new “final” image that was based off of “base” (the run time).
The new DockerFile looks like this in its entirety:
1 |
|
Now that the image is built, I can run it like normal to test it out:
1 |
|
Huh, it actually seems to have worked! :D
Now I can push the image up to dockerhub, and pull it down on my server.
1 |
|
Now, to see the difference in size between the previous image and the current, I run docker images and am presented with:
So we went from a chonky 2.23GB to a cool 417MB, nice!
Thanks to GaProgMan for pointing me in the right direction for making my docker image more useful. Code for this post can be found:
Related:
DockerFile
for better multi stage support by Kritner · Pull Request #27 · Kritner/KritnerWebsiteThe ketogenic diet is regarded as a high fat, moderate protein, and low carb diet. To stay in ketosis, the state your body is in when burning fat for energy, you must generally stick between 20g and 50g net carbs per day.
Net carbs are the thing to watch on the keto diet. Net carbs can be calculated by taking the “total carbohydrates” minus the “fiber” and (sometimes) minus the “sugar alcohols”. Note that the “(sometimes) minus” is due to the fact that sugar alcohols may or may not spike your insulin and/or impact your blood sugar, it really depends on the person, and the particular sugar alcohol in question. You’ll need to experiment yourself to determine if a specific sugar alcohol impacts your blood sugar or not, if it does, then that type of sugar alcohol should be counted as a carb; and if not, it shouldn’t.
My wife and I are both programmers and as such, we’re on our butts almost the entire day. I had always been a pretty skinny guy, at least through high school. I was a pretty consistent 145 pounds for each year of high school, but with the too much eating out, snacking, etc, I had made my way up to an overweight 195 pounds several times since then.
The last time I had hit this weight, I had taken up running to get in shape. This worked out great at the time! Back then, I had a 5 minute commute and no baby; in comparison to now with a 1+ hour commute, and 1 baby (with another on the way). Suffice it to say, I no longer have the leisurely 7 hours or so a week to spend on running, I’m doing at least that on my commutes, not even accounting for my (now) toddler Aaron.
Along came the keto diet. Kristen brought this up to me as a way for us to lose weight. We both did research, started listening to 2ketodudes podcast, and decided to give it a shot!
So what’s the story with keto? Well…
Ketosis is a state your body is in when burning fat to produce ketones, an alternate source to glucose to give your body energy. Ketosis is achieved when the body is taking in anywhere between 20–50g of net carbs a day. Once your body is in ketosis, it no longer has access to glucose, so ketones are produced and used as your body’s fuel source.
Wait, ketones, ketosis? I thought those were bad for you?!
Some people may have heard that ketones can smell sweet or like nail polish remover in your urine, and if they’re present it could be problematic. Ketones being present can be an indicator of ketoacidosis, which is not to be confused with ketosis. Ketoacidosis is generally attributed to type 1 diabetes complications. Ketoacidosis occurs when your body has too little insulin to handle the high amount of glucose in your blood.
So ketones in your blood can be bad, but if you’re following a keto diet, they’re expected and shouldn’t be problematic. Obviously, check with your doctor before doing any sort of diet change like keto.
Weight loss is probably the most obvious benefit to keto if it was being considered as a diet. The weight loss is due to a few factors namely:
Insulin resistance is the body’s inability to use insulin as effectively as it should. Insulin is released into your body in response to food, but namely carbs. On the ketogenic diet, the amount of insulin your body needs to function is dramatically reduced. This reduction of insulin over time can help your body to become less resistant to it; not to mention the fact that high insulin has many health detriments associated with it. More information on insulin resistance can be found here:
https://www.healthline.com/nutrition/insulin-and-insulin-resistance
Your body is used to being powered by sugar, but there are some sources that state that ketones (the thing your body uses for energy on the ketogenic diet) are better for powering many of your organs, including brain. I’m not a nutritional scientist and don’t know how much truth there is to it, but a lot of people claim that when on keto your mind is sharper.
The Ketones Brain: Using a Keto Diet for Better Mental Health
One of the reasons the keto diet was prescribed was actually due to epilepsy, not weight loss. The keytones powering your brain for whatever reason are apparently good for reducing seizures in children who have otherwise not responded to medication.
Kristen has polycystic ovary syndrome, or PCOS. This is something that can lead to carrying weight, especially around your stomach, and is associated with a difficulty in conception and carrying a baby to term. The keto diet can apparently help resolve some of the symptoms of PCOS. Additionally, some have had additional success with conceiving and carrying a baby to full term, if nothing else because of being a healthier weight!
The keto diet has also been attributed to healthier swimmers. I mentioned it earlier, but Kristen and I are expecting our second child in a few months, we found out we were pregnant just a few weeks/months into keto! Due to the diet, specifically the high fat, Kristen needed to drop keto, as the amount of fat we were having was not sitting well with those pregnancy aversions; but hopefully she’ll be able to pick it back up, and continue on our keto journey!
Can the Keto Diet Help Boost Fertility?
The keto diet is starting to be studied in type 2 diabetes, and now even type 1! I find it kind of strange that it’s taken so long for the diet to catch on for diabetes treatment, since the whole keto diet mantra is to have less of a need on insulin for your body to function. For type 1 diabetics, who can’t produce insulin, it seems like it only makes sense to have a diet that makes your body not need as much insulin.
https://diabetesstrong.com/ketogenic-diet-and-diabetes/
We used to eat out a lot; I mentioned it before, and I attribute it to a lot of Kristen and my weight gain. I’ve always been a cook, but my wife and I have always struggled with coming up with meals for the week.
For a while (prior to keto) we were doing a meal plan service — Blue Apron to be precise. We really loved what this service did for us, especially around the limited number of options to choose from, we could just choose. The most difficult part of meal planning for us, I think, but just the infinite number of things to choose from when planning out meals for the week.
I don’t recall if Blue Apron had a keto option or not, I know some of the meal planning services do; however it’s always an upcharge for keto, on an already expensive service. On Blue Apron I think we were doing 3 meals for 2 a week, at 60$ a week. Some of the meal prep/delivery services we were looking at charges 15$ a week more on top of that 60. That’s just too much!
So what do we do? It’s too much of a hassle to plan meals in the beginning of the week, and too expensive to do a keto meal plan service. Luckily, Kristen found an app call Mealime.
Mealime - Meal Planning App for Healthy Eating
Mealime more or less gave us what we loved about the meal delivery services in that we could just pick from a set of full meals, but without the cost. We can easily scale up or down the meals we’re choosing, and we can choose as many meals a week that we’d like. With Mealime we are able to save “favorites”, and can try many different meals, or stick with our normal gotos (or favorite! :D).
You’re able to tailor Mealime to your dietary restrictions, in our case keto. What kind of food can you eat with keto? Thankfully, a lot. Eating keto isn’t really all that different than eating a typical American diet; you just don’t have the starch with your meal.
Since fat is now your fuel source, you can eat all kinds of rich, fatty foods; foods that had you eaten on a normal diet you’d definitely be packing on the poundage. I’m eating more butter and steak than I ever have, and shedding the pounds! Note, be careful about too much red meat and butter and all that. Keto can apparently lead to higher cholesterol.
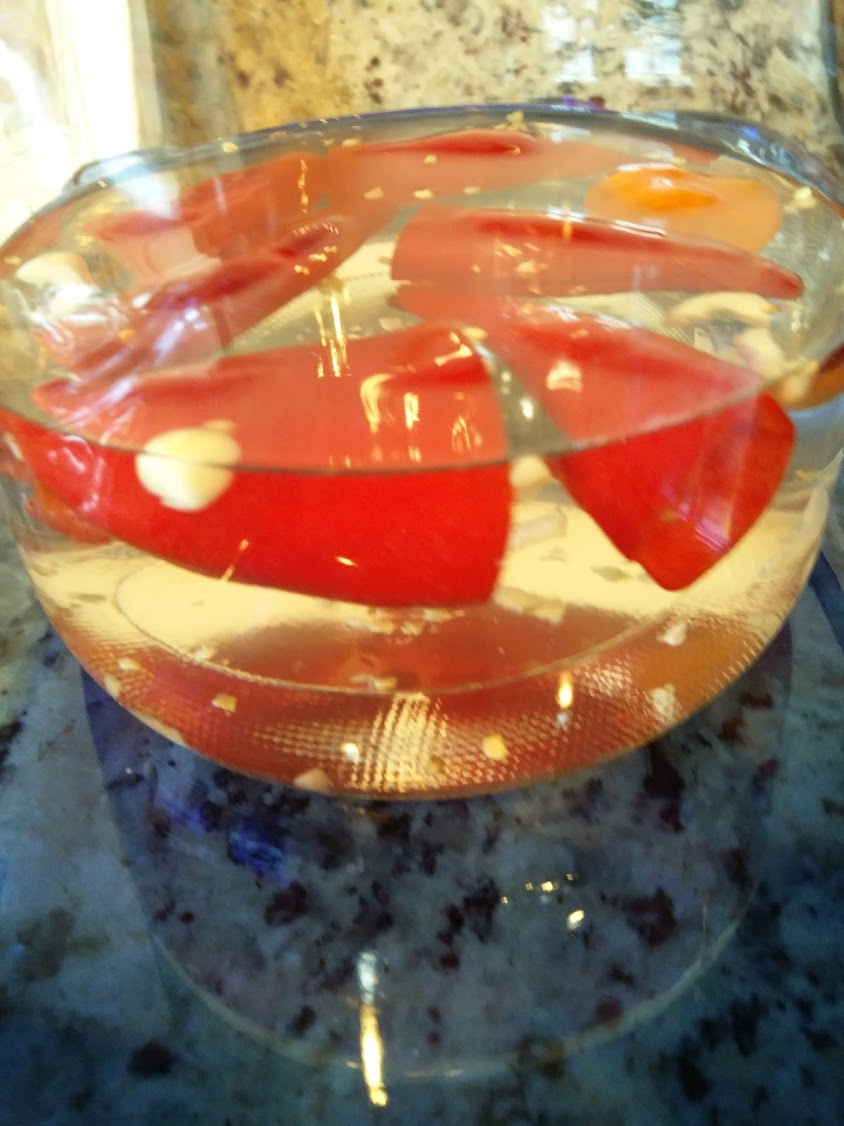
Anyway, back to Mealime and some of the stuff we eat. Here’s some of our “favorite” meals from Mealime:
You can probably tell, but we’re still eating pretty well. The food above is “more or less” exactly what we’d eat before, just with more butter, coconut oil, or avocado; minus the rice, potatoes, pasta, etc.
I started 2018 at 195 pounds. Throughout the year, until we started keto around June or July, I had brought that down to 185. It’s now February 2019, and I’m down to 153–157, depending on the day, which I’ll get into in a bit.
I’m using a smart scale to track my progress, but unfortunately the first few weeks of keto my smart scale was not syncing, as our wifi information had changed and I didn’t think to update the scale. That being said, when I did update the scale, I started tracking my progress. Here is what my progress looks like right now:
The results:
I hit my goal of 160 pretty quickly, and have been maintaining around 153–157. This is crazy to me — just by changing the way I eat by eliminating carbs and upping fat, I dropped more fat and weight than I did when I was running 20+ miles a week!
At the start of keto, I made sure to keep my carbs closer to 20g, usually a bit under. For the first few weeks I started the day with bulletproof coffee — coffee that was blitzed together with butter and MCT oil (it’s really not as bad or weird as it sounds). For lunch I would either skip (on days that I was fasting), have a salad w/ avocado, or even pho! (Note, without noodles)
As stated above, we’d follow Mealime for our dinners, and often we’d have leftovers (which were great for lunch!). Another benefit to Mealime over our previous Blue Apron; with Blue Apron we’d never have leftovers, so it often just meant more cooking more often, that’s no good when you’re trying to save time and money!
At this point I am maintaining my weight, just keeping an eye on things. I generally stick to a keto diet between 5 and 6 days in a week, and indulge a bit with some carbs 1 or 2 days a week. The hardest part of keto to me, was not being able to eat a few of my favorite foods for a few months. At this point, since I’m at my goal weight, I have worked those foods back in a bit to treat myself. If you can’t enjoy your favorite foods once in a while, is it really worth it?
Of course my favorite foods: pho, ramen, sushi, and tacos, are pretty carb heavy. Sticking to these favorite foods once or twice a week, has allowed me to maintain ketosis, and my weight, pretty consistently.
I’ve been doing this for less than a year, but I’m hopeful that keeping a consistent one or two cheat days a week, will allow me to keep the weight off.
Something about cheat days, I don’t always even necessarily leave ketosis these days. I have a few times, to be sure, but not always. The nice thing about once you’re fat adapted, it’s much quicker to get back into ketosis than previously. It’s generally pretty obvious when I’ve left ketosis, as I’m usually around 5 pounds heavier than the day before’s weight; this is of course due to having enough carbs to start a glycogen store, where a lot of weight is stored in the form of water and glucose.
Resources
Orleans observers are build by creating an interface that implements the Orleans’ namespaces’ IGrainObserver
interface. Observer methods must have a void return type, and can be invoked via a grain when “something” happens, in the form of a method call.
The Orleans Observers documentation can be found:
Observers | Microsoft Orleans Documentation
There are a few steps to setting up an observer and a grain that can manage observers:
IGrainObserver
, and a class the implements the new interface.To hopefully go for the most straightforward observer, we’ll create an interface (and eventually class) that simply takes in a string message. This interface will look like:
1 |
|
In the above, we have a single method that takes in a string named message. This interface will act as our “observer” interface. As you can see this interface is quite simple — the only constraints being observer methods need to have a return type of void and the interface itself must implement the built in Orleans type of IGrainObserver
.
Next, we’ll need a grain interface that can handle the registering and unregistering of observers, along with a method that should be used to “notify” the registered observers of the intended to be observed event.
1 |
|
Again pretty straightforward — we have a Subscribe
and Unsubscribe
method that take in an IObserverSample
(the interface from the previous step), and a SendMessageToObservers
, which, strangely enough, can be used to send messages to registered observers.
The documentation called out using a built in class ObserverSubscriptionManager
to assist with managing observers, however this class was apparently moved into a legacy assembly. The class could still be found in some of the Orleans samples, and here is that class with a few tweaks:
1 |
|
Note, the original class I found on the Orleans github repo (under their samples):
we have all the groundwork and abstractions created for our observer/observable — now we need concretions for those interfaces.
The one new grain being introduced handles the sub/unsubbing, as well as notification “event” to the subscribed observers. This grain should look relatively familiar:
1 |
|
In the above, the only new thing not covered before (pretty sure) is the overriding of OnActivateAsync
. In this method, we’re newing up the _subsManager
and proceeding with the base implementation.
The Subscribe
and Unsubscribe
methods register or remove the passed in IObserverSample
from the GrainObserverManager
, while the Notify
method sends the event notification to all subscribed observers.
In this demo, two new IOrleansFunctions
are to be introduced. One of the functions will be used as an observer, and the other will be used to send messages to that observer.
Starting with the simpler of the two, the event sender:
1 |
|
In the above, we’re using one of the three methods from the grain interface defined earlier. From here, we’re just utilizing the function to send user entered messages to our subscribed observers (if any exist).
How do we get observers to exist? That can be accomplished with the second IOrleansFunction
.
1 |
|
A few new things happening in the above IOrleansFunction
. First, our PerformFunction
method is being used to occasionally subscribe to our observer manager grain — this is done as sort of a “heartbeat” to keep the observer alive. I don’t think it has to be done this way, but working with the sample code from the documentation, this seemed to work out ok. I guess the alternative is not having observers expire, and keeping them around indefinitely? In the above, we’re doing our normal GetGrain call, but additionally, we’re setting this as an observer reference, to be registered with the observer manager.
The other method ReceiveMessage
is the method being implemented from the IObserverSample
. This method is the handler for what happens when the Notify
from the observer manager is called.
Now all that’s left is to run the application and make sure it works! For this demo we’ll as usual run the silohost and client, though this time we’ll actually be running two clients. One client will be used as the observer, and the other will be used to send a message to the observer. What does this look like?
Code as of this post can be found here:
Kritner-Blogs/OrleansGettingStarted
I’ve used EF previously, but in this case I wanted to go a bit old-school. I threw together a little abstraction, which… seems… to work…? Maybe I can improve on this as I go, or if nothing else help someone else with it, or myself down the line. Feedback appreciated! :)
A few things are needed for working with a db connection:
There’s a fair amount to connection strings — keeping them in the code, in configuration files, in environment variables, probably more. In my case I wanted to store them in a configuration file that can be swapped in and out based on the environment. For more information on how this swapping config files based on environment is done, see:
.net core console application IOptions
For our connection string we’ll need a few things:
We’ll put our example connection string in appsettings.json:
1 |
|
For our database connection, ideally we’d make use of a method that creates the connection for us, as to avoid some newing up of classes within our actual services. The only thing we actually need for newing up a db connection is the connection string. This makes our factory method’s signature very simple. Note I’m using the term factory here, I’m pretty sure this is a factory, but not positive, can someone correct me if wrong?
1 |
|
Note that in the above, IDbConnection
is a built in type from the namespace System.Data
.
And an implementation:
1 |
|
Simple enough — new up and return a SqlConnection
using the connectionString
given as a parameter.
That’s pretty much all there is setup wise before we can start using this thing.
How to do that?
1 |
|
It’s unfortunate how “nested” the code gets when working with using blocks, but using blocks are considered best practice (at least last I checked) when working with objects that implement IDisposable
(which they MUST to be used within a using block). The using block ensures the code is “disposed of” more effectively, and doesn’t leave it up to the consumer to remember to have to close connections and things of that nature.
One thing I like about the above, is we’re working with everything’s abstraction, rather than concrete — which again, helps (forces?) us to write more easily testable code.
Finally, we’re using an extension method AddParameter
since the interface does not provide a very “pretty” method of adding one.
The extension method looks like:
1 |
|
This helps us avoid a “few lines” for each parameter added — as they’re now condensed into a single line call. I don’t remember the specifics on when the DbType
needs to be specified on the IDbDataParameter
(the thing command.CreateParameter
returns) — but this should work, until it doesn’t. At that point you could throw together a few more extension methods to handle the additional properties that need setting on the parameter.
There’s a bit more to it when projecting the reader’s returned values into an object, more so than what you get from EF, but it’s pretty straight forward. Perhaps I’ll slap that in here at some point.
Gist of code:
Related:
]]>Some of the concepts we’ll be working with in this post include: appsettings, IOptions
, builder pattern, extension methods, and Orleans itself.
We’ve covered many of the different “options” when it comes to a local vs prod ready configuration, but never how to handle those differences. Some differences you are likely to encounter, depending on which features you’re using from Orleans include:
We’ve seen how Orleans makes heavy use of Builders- a Creational Pattern, which we will leverage along with a few other posts I’ve written about previously, to set up our application for multiple environments.
We’ll make use of some of the things learned in:
.net core console application IOptions
to get our Orleans application updated for running under multiple configurations.
For our local configuration, we are having the IClientBuilder
and ISiloHostBuilder
construct our cluster and clients using LocalHostClustering. That looks like:
Client:
1 |
|
SiloHost:
1 |
|
For local testing, UseLocalhostClustering
is sufficient. However, it is not something we’d use in a production scenario.
What can we do to fix that? A few steps:
IOptions
.We’ll be applying a lot of the same ideas from .net core console application IOptions
First, we’ll introduce a new common project that will house the POCOs and bootstrapping of our application.
Run dotnet new classlib -n Kritner.OrleansGettingStarted.Common
to create the new project:
We’ll need a POCO to represent our Orleans configuration, depending on the environment. The few things that we’ll need to keep track of (at least in the way I plan on proceeding) includes:
Note that much of this information is based on the documentation at https://dotnet.github.io/orleans/Documentation/clusters_and_clients/configuration_guide/typical_configurations.html. We could also apply this same logic for using Azure clustering, but I don’t have any Azure credits, so going with this for demonstration purposes.
Our configuration POCO:
1 |
|
In our new class library, we’ll create a few classes to help “bootstrap” our two console apps, for pulling in configuration files, and setting up the configuration (in this case IOptions<OrleansConfig>
).
Let’s add a few new configuration files:
appsettings.json
1 |
|
I’ll be using the above as the production configuration. The above configuration specifies there are two nodes (SiloHosts) to our cluster, the primary will be the first in the array, the secondary the second (you can have more than two). With the clustering configuration we’ll be using, a primary needs to be specified; with other configuration types like azure table storage, there is no “primary” node, so generally more Highly available (HA).
appsettings.dev.json
1 |
|
In the above config, which we’ll be using for our dev environment (local testing), we’re not really giving “valid” configuration values, as these same properties aren’t used at all for LocalhostClustering. The reason I added these values was just mostly to show off the loading of a specific environment configuration file.
I’ve set up the configuration files so that they could be used for BOTH the client and silo-host, as such we’ll only want to keep a single copy of each around, so I placed them in /src/_appsettings/*.
In order to get both projects to “use” these files, we’ll link them in our csproj. The linking can be accomplished by adding the following to both the client and silo-host project’s csproj files:
1 |
|
Next we’ll need a way to load configuration files, and set up our IOptions
. The following works, but I dunno if it’s the right way to do it — let me know!
ConsoleAppConfigurator:
1 |
|
Startup:
1 |
|
At this point we can test our configuration file is being loaded successfully, as well as hydrating our OlreansConfig
class.
Within one of the Program.Main
s we can add the following, just to confirm our object is being populated (confirm in o
.)
1 |
|
This ended up being a lot longer than I intended… but there’s only a bit left to go, I swear!
As stated earlier, we want to use LocalhostClustering
for one environment (Dev) and Develop/Static clustering for the other environment (Production).
Because we’re actually using two separate methods to configure our clustering, we’ll introduce an extension method to configure the cluster differently, based on environment. The whole reason I’m going that route is to avoid the pollution of branching logic within the client/silohost builders.
Here are those extension methods, they’re pretty straight forward…
IClientBuilderExtensions:
1 |
|
ISiloHostBuilderExtensions:
1 |
|
In the above, for our “dev” environment, we’re simply using UseLocalHostClustering, and for all other environments (assuming you have more than just “dev” and “prod”), we’ll be using the configuration values as specified by the actual Orleans config. In many cases companies will have environments like “test”, “qa”, “uat”, etc.. Using separate appsettings.{env}.json allows for separate configurations, without having to make use of the old web.config transforms, or “remembering to copy the appropriate config file”. Going this route, you simply need to have the correct environment variable configured on the machine hosting the code.
Now to test, we’ll introduce some new running profiles like so…
launchsettings.json:
1 |
|
We’ll need this in both our Client and SiloHost projects, as those are our runnable projects. You can also pass in the environment variables when running via console through commands like set ASPNETCORE_ENVIRONMENT=dev
as an example.
Next we’ll update our Client build (and silo builder) to use the new extension methods
The original ClientBuilder:
1 |
|
becomes…
1 |
|
In the above, we swapped out UseLocalHostClustering
for our new ConfigureClustering
extension method. This method takes in our parsed IOptions<OrleansConfig>
as well as the environment name. A similar change is done to the SiloHost builder.
Now we can use our separate run profiles to demonstrate the fact that our new builder extension method is being hit, and the client/silohost is being configured differently depending on the environment.
When running as the “dev” config:
In the above you can see our extension method is properly switching on the dev environment, and continuing to use the UseLocalhostClustering
.
And running the client again, this time as Production:
In the above, you can see that our production logic clustering is being hit, and that the orleansConfig
object has our correctly hydrated object.
Just for craps and laughs, let’s dotnet run the silohost and client, just to make sure everything’s still working:
There it is!
In this post hopefully we learned a little bit more about using appsettings, IOptions
, the builder pattern, extension methods, and Orleans configuration.
All the code from this post (and previous posts related to Orleans) can be found:
Kritner-Blogs/OrleansGettingStarted
The original tweet:
I checked kritner.com and didn’t do so well. Let’s see about changing that!
Website security — We did the whole A+ on ssllabs thing:
Going from an “A” to an “A+” on ssllabs.com
But what about having a secure site from the headers point of view? Let’s get going!
Owasp is a great resource when it comes to helping keep your application secure:
OWASP Secure Headers Project - OWASP
The OWASP site goes into great detail about the top security vulnerabilities, how to prevent them, and how to secure your site through various different potential attack vectors. Right now, we’re concentrating on security headers.
The TLDR of utilizing security headers is to set up an agreement between client and server between what is, and what isn’t allowed when connected to each other. Ensuring we’re communicating over HTTPS, not allowing the site to be loaded within an iframe, and preventing cross site scripting, are some examples of the problems appropriate security headers can help solve.
Just to get a baseline of what I’ll be dealing with on kritner.com — from securityheaders.com:
The above gives a nice breakdown of the rating, and information on the missing pieces of information.
Luckily for us GaProgman (the author of the tweet that spawned this post) has put together an OWasp secure header NuGet package, which I think will get my site most of the way there.
Jamie advised me to read the documentation first, so I suppose I should :)
Ok, I read it, did you?
Let’s install this bad boy!
1 |
|
and I’ll go with the default builder as specified from the readme, just to see where that gets me.
Within Startup.Configure()
1 |
|
Now all that’s left to do is build this thing and test it out! Note, I am using docker, kestrel, and nginx for building and serving my website, so I wasn’t quite sure if this would work without tweaks; thankfully, it did!
I just needed to:
After doing all that, and testing my site again, I am presented with:
Well, I don’t know what else to say. It’s super simple, and almost out of the box, to get your website into a more secure state. Now we’ve ensured kritner.com is secure through its SSL/TLS, and its security headers!
In the recent post I did:
Your favorite/most useful extension methods?
I explored working with xUnit for the first time, to help to ensure the extension methods I was implementing were working as I intended. Though I had written previously about the extension methods, I hadn’t covered the testing of them; I thought that deserved its own post.
If you’ve never worked with unit testing before, wikipedia describes them as:
In computer programming, unit testing is a software testing method by which individual units of source code, sets of one or more computer program modules together with associated control data, usage procedures, and operating procedures, are tested to determine whether they are fit for use.[1]
The way I usually describe it is: unit testing is the process of ensuring expected outcomes from a piece of code — ideally a single function — without relying on external resources. When unit testing, anything that’s needed outside of the method under test should be provided via an abstraction, rather than concretion — to ensure that you are testing only the method under test. The dependencies needed by the method can be provided by making use of mocks, fakes, and/or stubs — pieces of code programmed to exhibit specific behavior to help cover all potential “branches” within your code.
Not having worked with MSTest since prior to it allowing multiple testing scenarios to a single test, I wasn’t sure how to describe the differences. Luckily, a quick google search pointed me to a “differences” page written up on the xUnit site:
Comparing xUnit.net to other frameworks > xUnit.net
It appears that all the frameworks do the same thing more or less; though I find it interesting that .net core seems to pretty extensively use xUnit over their own testing framework of MSTest.
Thankfully, there is a project template (at least with whatever VS install options I used) to create an xUnit test project. If you do not have this, you just need to add the following NuGet packages to a project:
Your csproj file should look like this(ish):
I picked a method from my extension methods post, that would allow me to make use of various types of using xUnit:
The method we’ll be testing with is:
1 |
|
The above extension method exists on IEnumerable<T>
and works very similar to built in methods like int.TryParse(...)
. This method returns true/false depending on whether or not an item is found based on the predicate, and that item is then contained within the out parameter of result.
How can we test this? What in this method can be tested? Here are some of the things that can be tested:
ArgumentNullException
if items
is null
.ArgumentNullException
if predicate
is null
false
when no item is found matching the predicate
true
when an item
is found matching the predicate
result
contains the found item
that met the predicate
Let’s start with our test class:
1 |
|
One thing I like about xUnit over nUnit, is that I don’t need to decorate the class in any way to indicate it is a class with unit tests. We’ll need (or rather, I’d like) a class to play around with, since our extension method works on a generic IEnumerable<T>
. We can introduce a little fake class for testing purposes by updating our test class to:
1 |
|
In the above, I’m defining a new type, to be used only by this test class, that has a property of SomeInt
. Additionally, I set up some static data we will be using shortly to help ensure our method is working properly.
We have two ways our extension method can throw an ArgumentNullException
— when either items or predicate
is null
. Let’s see what tests for those conditions can look like.
ArgumentNullException
if items
is null.1 |
|
In the above, we’re setting up our IEnumerable<T>
to be null
, covering one of our branches in our method — this tests that when the items are null
, an ArgumentNullException
is thrown. NUnit decorated tests as [Test]
, here the test (in xUnit) is decorated as [Fact]
.
ArgumentNullException
if predicate
is null
1 |
|
In the above, I’m using a [Theory]
rather than [Fact]
— I’m not sure that I have to in this case, but from my NUnit days, I couldn’t instantiate instances of non primitives within an attribute, though I’m not sure if that’s a limitation of NUnit, or c#. Anyway, in this test I’m providing the sample data to the method that was defined in the test class definition, and then providing a null
predicate
; the second condition for throwing a ArgumentNullException
.
false
when an no item
is found meeting the predicate
In this test, we want to provide a valid IEnumerable<T>
to the extension method, with a valid predicate
; though in this case our predicate
is not a match on any item
within items
.
1 |
|
In the above, we’re making sure that the boolean
returned from our function is false
, since 100 does not exist within our sample data.
true
when an item
is found meeting the predicate
Next, we’ll make sure that the result of the extension method is true
when the predicate
matches an item
within the items
.
1 |
|
The above is really similar to the false
test, except we’re providing a valid predicate
that does match an item
within items
.
result
contains the found item
that met the predicate
Our final test, ensures that we retrieve the item
in the out results parameter from the function:
1 |
|
It looks like this when running our tests:
xUnit and nUnit seem to be pretty similar in syntax and structure, though I do enjoy the notion of using constructors for test class setup, rather than SetUp
as with nUnit.
The code from this post can be found:
Kritner-Blogs/ExtensionMethods
Related:
]]>First off, the docs:
Timers and Reminders | Microsoft Orleans Documentation
Reminders can be used in Orleans to perform tasks on a “schedule” more or less. I’m having trouble thinking of a simple example that actually makes sense, so, we’re going to go with an everything’s ok alarm:
ISiloHostBuilder
— we’ll use the in memory one just for simplicity’s sake, and to not have to rely on additional infrastructureI figured we could use the FakeEmailSender
introduced in:
Microsoft Orleans — Dependency Injection
in order to send “Fake email” everything’s ok notifications.
Starting from https://github.com/Kritner-Blogs/OrleansGettingStarted/releases/tag/v0.40, we’ll enable the in-memory reminder service by adding the following line to our ISiloHostBuilder.
1 |
|
The full method is:
1 |
|
Some other possible reminder services to use include AzureTableReminderService
and AdoNetReminderService
.
Let’s create our everything’s ok alarm grain! I discovered in writing this, that there is a 1 minute minimum on the amount of time between “reminds”, so unfortunately, we’ll not be going with the originally planned 3 seconds :(
1 |
|
In the above, we’re doing a pretty standard grain interface, with the additional (to be) implemented IRemindable
. Two methods are attached to the interface, one to start the reminder, one to stop it. Note that the IRemindable
interface requires the implementing class to implement:
1 |
|
As I mentioned previously, we’ll be using the FakeEmailSender
created from a previous post, as well as having our to be created grain utilize other grains (grainception)!
That could look like:
1 |
|
A few things of note from the above:
[StorageProvider(ProviderName = Constants.OrleansMemoryProvider)]
— we’re making the grain stateful so (theoretically) the reminder will persist on shutdown. Note, it will not in our case because of using in memory storage, I think it would otherwise.IGrainReminder _reminder = null;
— holds reference to our started reminder, used for stopping the reminder.Task ReceiveReminder(string reminderName, TickStatus status)
— this is the method where we actually define what happens when the reminder occurs.var emailSenderGrain = GrainFactory.GetGrain<IEmailSenderGrain>(Guid.Empty);
— here we’re using a slightly different means of retrieving a grain, since we’re actually doing it from the SiloHost
, rather than Client
. Note that this grain being pulled also makes use of dependency injection, but its dependency is only injected into the grain that actually needs it, not this reminder grain.as per usual, we’re going to create a new IOrleansFunction
concretion for use in our menu system; that new grain will also be added to be returned from our IOrleansFunctionProvider
.
1 |
|
As per the norm, we’ll be starting the SiloHost
, the Client
, and trying the new grain out.
In the above, you can see that our “FakeEmail” went out to the Orleans log, stating that everything’s ok.
One other cool thing we can see due to adding the Orleans Dashboard in a previous post is:
Neat!
In this post we learned a little bit about another Orleans feature — Reminders! You can find the code as of this post at:
Kritner-Blogs/OrleansGettingStarted
Microsoft Orleans, like most (all?) applications, can make use of dependency injection. How do we do it in Orleans? Luckily, it is accomplished in a very similar manner to what you should already be used to when working with .net core!
If you aren’t familiar with .net core DI, a quick sample:
1 |
|
Within (generally) your Startup.cs or thereabouts:
1 |
|
And that’s pretty much all there is to it (as it relates to a MVC/WebApi site anyway). When instances of IStuffDoer
are needed in class constructors, an instance is injected into the class — in this case the same instance, since we registered it as a singleton. You can read more about dependency injection here:
Dependency injection in ASP.NET Core
We can demonstrate this dependency injection concept in Orleans by building a new IOrleansFunction
of course! Note that this functionality was created for my Orleans series in:
Updating Orleans Project to be more ready for new Orleans Examples!
First, let’s start with our non grain related code — the stuff that we’ll be using and registering with the IOC container.
An email sending interface:
1 |
|
and an implementation:
1 |
|
We can register this FakeEmailSender
in our ISiloHostBuilder
. I use a little helper class to keep all my DI registration in its own area, separate from the ISiloHostBuilder.
Helper class:
1 |
|
Call the helper class from the ISiloHostBuilder
:
1 |
|
The entire ISloHostBuilder
method now looks like:
1 |
|
I’m just going to put into place a grain that sends out an email, using out new dependency injected service. Yes, we could just write the email sending within the grain itself, but I wanted to show off dependency injection Additionally, this way we can swap in a “real” implementation w/o the (small amount of) boilerplate involved with standing up a grain.
New Grain Interface:
1 |
|
And implementation:
1 |
|
In the above Grain, we’re taking in an instance of an IEmailSender
for use within the actual implementation of the IEmailSenderGrain
contract. With the setup we did in the ISiloHostBuilder
, the FakeEmailSender
is passed into the class automatically.
Now we need to wire up the new grain call into our console app menu — luckily this is simple due to the refactor pointed out in the above blog post.
Add a new class that implements IOrleansFunction
:
1 |
|
Let’s see what this looks like running.
dotnet run
the SiloHostdotnet run
the clientOutput:
Note in the above that the “email” is being shown in the Orleans console, as the FakeEmailSender
told it to just “log”, and from the context of where the function is running, it hits the Orleans log, rather than the menu-ed console app.
That’s all there is to it!
Code at this point is in this release on the GitHub repository:
Kritner-Blogs/OrleansGettingStarted
Related:
The Microsoft docs define an extension method as:
Extension methods enable you to “add” methods to existing types without creating a new derived type, recompiling, or otherwise modifying the original type. Extension methods are a special kind of static method, but they are called as if they were instance methods on the extended type. For client code written in C#, F# and Visual Basic, there is no apparent difference between calling an extension method and the methods that are actually defined in a type.
The above sounds pretty nice, but doesn’t seem to even touch on the fact that you can apply extension methods to code where you don’t even have the source!
Extension methods can be quite useful, but as the documentation says, use them sparingly. If the implementation of the underlying object you’re creating an extension method for changes, that could lead to some issues.
An example of a situation where I like to use extension methods:
1 |
|
In the above, we have a fair amount of nesting of code, just due to checking for nulls prior to doing in an insert onto a list. Extension methods can help to make this code much cleaner looking!
The extension method AddIfNotNull
:
1 |
|
The above adds a new function to IList<T>
and anything implementing it. Within the function, we check if the item to be added to the IList<T>
is null
; if it is we do nothing, if it isn’t we add it. Great, so how does this help us?
Well, let’s take a look at what the earlier snippet can look like, with the extension method:
1 |
|
That code is a lot shorter, and (I think) easier to read!
I added a few more to a repository (link near bottom). The current extension methods include:
IList.AddIfNotNull
— already describedIList.AddRangeIfNotNull
— similar to above, just on a multiple object levelIEnumerable<T>.TryFirst
— attempt to get an item from a list, with bool as return and actual object in out param — similar to how int.TryParse
works.What are some of your favorite useful extension methods? Feel free to respond below, or submit a PR!
Code (as of writing) can be found:
Kritner-Blogs/ExtensionMethods
Or as a NuGet Package:
]]>While working on the post “Microsoft Orleans — Reporting Dashboard”, I ran into an issue where code generation seemingly stopped “generating”.
Here’s a compare of when Code Generation was working (pre the start of previously stated post), and when it stopped working while writing the post:
Kritner-Blogs/OrleansGettingStarted
As you can see, not much had changed between the two, but for whatever reason, the SiloHost stopped being able to instantiate instances of my grains, or at a minimum the Client was saying that the SiloHost couldn’t.
When the issue is not present (like in commit), running the application looks like:
When It is present, (like in commit) it looks like:
I have opened a GitHub issue to try to get clarification on what I’m experiencing; but in the meantime, there is a workaround.
I was under the impression that projects containing the Microsoft.Orleans.OrleansCodeGenerator.Build NuGet package would automatically run code generation, though that didn’t seem to always be the case as per the github issue I submit above.
In order to get around the code generation not firing, I took a few different steps. (Note, I’m guessing some of these steps could be omitted, but I just mostly tried to brute force it, and once it was working left it alone):
The interface I used for the grain interfaces, was created under Kritner.OrleansGettingStarted.GrainInterfaces:
1 |
|
The grain implementation interface was created under Kritner.OrleansGettingStarted.Grains:
1 |
|
The grain interfaces I have — IHelloWorld, and IVisitTracker were updated to additionally implement IGrainInterfaceMarker. The same was done for the grain implementations, but implement IGrainMarker.
Now that our grains and interfaces are implementing their new respective interface markers, we just need to register those interface types on the ClientBuilder and SiloHostBuilder as so:
ClientBuilder:
1 |
|
SiloHostBuilder:
1 |
|
Now that these changes have been made, the grains are being successfully called on the cluster from the client! Hooray!
The commit where this correction was put in place is located here: https://github.com/Kritner-Blogs/OrleansGettingStarted/pull/6/commits/9c271f085d22a66f8e8d3c3165eda863e5269508
I heard back from Sergey in the GitHub Issue:
Question: What triggers code generation? · Issue #5154 · dotnet/orleans
Basically putting in the Orleans Dashboard, effectively turned off the “automatic scanner” I was taking advantage of previously. The act of adding the Orleans Dashboard called into AddApplicationPart, under the covers, which in turn turned off automatic scanning. I guess the reasoning behind this was “the developer is registering something (even though it was Orleans Dashboard), so there’s no need to do automatic scanning for the grains to be picked up.
Related:
As a refresher — Orleans, like other actor model frameworks, is a means of distributing compute across a series of machines that act as a cluster. In the case of Orleans, a lot of that cluster management is seemingly transparent, and abstracted away from the user. That is both awesome, and makes me a bit uncomfortable! Thankfully, the awesome people that built and/or use the product built an addon dashboard to help alleviate some stress!
Orleans Dashboard was suggested to me in the Orleans Gitter when I was inquiring about how to look into “how my system is doing” when running a cluster. The dashboard is stupid simple to get started with, so let’s get going!
I’m using release v0.30 of Kritner-Blogs/OrleansGettingStarted as my starting point, and this will give us a few different grain types to play around with to watch the fancy new dashboard.
The README.md from OrleansDashboard covers the setup very well, but since it’s so short and sweet, here are the basic steps:
That’s it!
Within the Kritner.OrleansGettingStarted.SiloHost project, add the following line (highlighted)
Again within the SiloHost project, modify the ISiloHostBuilder to have the following line prior to Build():
1 |
|
Should look like:
There are a few configuration options we could make use of, but for simplicity, let’s just see what we have right now!
The only thing we need to do now is start up the SiloHost, and navigate to the default URL of localhost:8080. We’ll start the SiloHost as normal, by navigating to the SiloHost folder in a command prompt, and running dotnet run. Next navigate to http://localhost:8080. We should now be greeted with something like:
There’s a fair amount of information present on this, and the other pages that are provided in the OrleansDashboard. Additionally, the front end code is customizable so you could theoretically work in your own metrics. As you can see from the above, there are already some grains working their magic — new grains introduced by the dashboard itself.
Currently CPU/Memory usage is not visible from the .net core implementation of Orleans — but hopefully something will be done to remedy that in the future? Perhaps it’s a limitation of the API available in netstandard?
This dashboard is great and all, but how do I see it in action? Rather, not the default grains action? Well that’s easy! we just need to run a few grains!
I want to run a potentially large number of grains, perhaps the number of which is input by the user. To do that, I’m going to expand on the Polymorphism based work we did in “Updating Orleans Project to be more ready for new Orleans Examples!”, by adding a new menu option.
Note, I was having some trouble with my Client or Server getting or serving instances of grains, I have corrected this but will likely put in a github issue and/or separate post to try to understand the reasoning behind it being an issue. The gist of the issue was code generation did not seem to be running on the silo builds for some reason, even though it did previously.
Anyway, onto the new IOrleansFunction:
1 |
|
In the above, we’re simply prompting the user for a number input, then running our two implemented grains that many times. We should be able to demonstrate the dashboard picking up the grain activations quite easily using this new IOrleansFunction.
It should look something like this when running:
Code changes (though minimal from the previous post) can be found: https://github.com/Kritner-Blogs/OrleansGettingStarted/releases/tag/v0.35. Note there are additional changes not covered in this post between v0.3 and v0.35 related to the grain generation not firing, I will (probably) have another post regarding that at some point.
Related:
Prior to continuing with my Microsoft Orleans series, I wanted to make the Console app calling my Orleans Grains a bit simpler to use under the various examples. How can I do that? Polymorphism to the rescue!
In the previous few Orleans posts (links at bottom) I was swapping in/out calls to various Orleans methods in my Console app’s Program.Main.
That looked something like this:
1 |
|
In the above, as I added new Orleans functionality, I would simply tack on additional calls and/or comment out previously used functions. I’m not sure how far I will go with these Orleans examples, but since this is going on my third or fourth sample, I wanted a better way to manage these calls. In addition, give the user of the console application the option of choosing which function to play with, without having to require them to change code in between runs.
How can we do this? With a few simple steps:
We’ve touched on polymorphism before, though perhaps not called it by its name. From Wikipedia:
In programming languages and type theory, polymorphism is the provision of a single interface to entities of different types[1] or the use of a single symbol to represent multiple different types.
What does this mean? Basically — use interfaces and/or other abstractions (like abstract classes). How does it fit in with what I’m trying to accomplish? Well, I’m implementing a bunch of different examples that call into a Orleans cluster to demonstrate a feature of Orleans. So what kind of interface definition could I use? Let’s start with:
1 |
|
In the above we have a method that does nothing but PerformFunction
(whatever that ends up meaning), and returns a task.
Hmm, one other thing that’s going to be needed is to use a IClusterClient
. There are a few ways I could accomplish this, keep it separate from the abstraction, and make it available to the implementing class, or just make it a parameter of the interface method. In the way I’m going to use the implemented classes later, I’m opting for making the IClusterClient
a parameter on the interface method. Updated to look like:
1 |
|
One final thing we’ll need (at least for now), is some method of describing the IOrleansFunction
. We can do that with this simple addition:
1 |
|
Now, we can provide a description for each implementation — something we’ll be using as the “choices” within the console app menu.
So why go through all this trouble? Prior to going this route, I had a harder time implementing new functionality, without having to “move around a bunch of stuff” and continual editing of already existing classes. How can I avoid this now? Well, the only thing I need to do now (ideally, if I did this right), would be add a new implementation of IOrleansFunction
and the system would pick it up without any fuss.
Why is polymorphism the neat? Because you can interact with interface methods without caring about the actual implementation. This makes your code more loosely coupled, and things like unit testing, and code maintainability are simpler; this is touched on a few posts elsewhere I’ve done (links at bottom).
I’ve done a few separate Orleans examples:
Those seem perfect for new implementations IOrleansExamples
!
This is going to mostly be copy/pasting from previous posts, just into their new abstraction, and providing a description.
HelloWorld:
1 |
|
MultipleInstantiations:
1 |
|
StatefulWork:
1 |
|
Now that our implementations of IOrleansFunction
are complete, we simply need to plug them into our to be created menu system!
With the menu system, the user should be able to enter a number that corresponds to a specific Orleans feature, then that feature should execute.
A few things we’ll need for the menu:
We’ll need to keep a collection of our OrleansFeatures
and what better way to do that than with another interface! I’ve defined a new interface IOrleansFunctionProvider
as:
1 |
|
The above interface does nothing but return a IList<IOrleansFunctions>
when invoked.
The concretion of said interface is simple enough as well:
1 |
|
In the above, we’re just newing up and returning a list of each one of our current OrleansFunctions
that we created earlier.
Now we need a way to display features on our menu — luckily for us we thought ahead, and created a Description on our IOrleansFeature
interface.
That coupled along with our IOrleansFeatureProvider
, means we can enumerate what the provider returns us, printing out each description. We’ll be using a [slightly hacky(?)] method of assigning a feature to a number via the collection’s index, but /shrug, that’s ok right?
Let’s start a new class OrleansExamples
:
1 |
|
In the above, we’re using the results provided by our IOrleansFunctionProvider
, enumerating them, printing out the IList<IOrleansFunction>
index along with the IOrleansFunction.Description
, parsing the user input, and attempting to invoke the appropriate method on the collection as per the index. Notice how we are only working with interfaces here as it pertains to IOrleansFunctionProvider
and IOrleansFunction
. This class has no idea what the implementors are, because it doesn’t really matter as to the scope of this class (loose coupling).
It’s a simple matter of adding an if conditional to check for a specific entry to exit the menu, as currently, our menu will loop indefinitely.
Add a new const to the class:
1 |
|
and a new conditional within the while loop to check for that escape string, prior to executing the grain sample:
1 |
|
The final piece for completing our menu, is to plug the new bits into the Program.Main of the application.
That’s simple enough to do, because it’s mostly deleting of code! I love deleting code!
our original:
1 |
|
Damn… that’s a lot. But all that code now becomes…
1 |
|
That’s a lot of removed code! (Granted, a lot of that code was refactored into the individual IOrleansFunctions
. But we never have to look at all that code again!
So what does it all look like?
Application Start:
Choosing the “Hello World” example (choice 0):
Choosing the stateful grains example (choice 2):
Exiting (choice -1):
This ended up being a longer post than I intended, but hopefully it will help convey how working with interfaces can help better abstract and break down the work you need to do. That coupled with other “features” of abstraction such as unit testing, loose coupling, and an easier “high level view” of an applications architecture, are why I enjoy working on abstractions so much.
Code for this post can be found https://github.com/Kritner-Blogs/OrleansGettingStarted/releases/tag/v0.30
Related:
Note the starting point of this code can be found here. As described previously, grains are the “primitives” that are created for use with Orleans code. You invoke grains in a very similar manner to your “normal” code to make it as simple as possible. In the previous example we simply called the grain a single time; it takes in a value, and spits it back:
1 |
|
Returns:
Grains don’t have to be used only once, in most situations I would wager they’re used in the hundreds and thousands of times. Though the current grain we’re working with doesn’t have much use to be invoked multiple times, it can still make for a (good?) example.
Let’s change our grain implementation a bit from:
1 |
|
To:
1 |
|
In the above, we’re now printing out the grain’s uniqueId/primary key. The primary key isn’t super important in the current state of the grain implementation, but patience you must have, my young padawan.
Next, let’s change our Client to call a single grain, several times. The original:
1 |
|
Should change to:
1 |
|
Running the above code will present us with:
Above, we can see that the same grain (as indicated by *grn/CD25ADD4/ba676182
) was used for all three invokes of grain.SayHello.
Now you may be wondering to yourself:
Can we have multiple instantiations of the same grain, with separate primary keys?
We sure can! Let’s take a look:
1 |
|
output:
What does the above all mean? In part, it means that grains can be instantiated one or multiple times depending on need. What kind of need would we have in multiple instantiations? Well in this grain’s case, none that I can think of since the grain always returns what it receives. Where multiple instantiations can really shine is when it comes to grains containing state and/or contextual data.
Grains can have a notion of “state”, or instance variables pertaining to some internals of the grain, or its context. Orleans has two methods of tracking grain state:
Grain<T>
rather than Grain
Generally, I’d prefer to not write code that’s already been written, so I’ll be sticking with the first option.
In order to track grain state, our grains state needs to be persisted somewhere. Orleans offers several methods of grain state persistence (doc). For demonstration purposes, I’ll be using the MemoryGrainStorage. Be advised this this method of persistence is destroyed when the silo goes down, so is probably not especially useful in production like scenarios.
To utilize stateful grains you need a few things:
We need to configure our storage provider — some of the providers can be “more involved” in that you need some sort of backing infrastructure and/or cloud capabilities/money (:D). That’s a big reason I’m going for the memory provider!
To register the memory provider, let’s update our original SiloHost’s builder from:
1 |
|
to:
1 |
|
Note that since the above is using a Builder Pattern, you could just add:
1 |
|
as a separate line in between the instantiation of the builder, and the var host = builder.Build();.
That’s it!
Next, let’s slap together a grain with some state.
We’ll create a grain that can track the number of times a user visits our “site” (pretend it’s a website). The first thing is to define the interface:
1 |
|
Properties of the above:
String key
— since we’re using it to track visits to our site, using the account email seems to make sense as a unique keyTask<int> GetNumberOfVisits()
— this method will be used to retrieve the number of times a user has visited.Task Visit()
— this method will be invoked when a user visits the site.The grain implementation:
1 |
|
A few new things going on above:
Grain<T>
instead of Grain where <T>
is a state class.Finally, let’s see what sort of things we can do in our Client app using our new stateful grain.
1 |
|
Nothing in the above that we haven’t really done before, getting instances of the same type of grain using two separate “users”, invoking grain methods on them several times, and printing the results.
When running the app, we are presented with:
You can see in the above that our visit counter is incrementing with each visit, and kritner is visiting a lot more than notKritner.
What happens if we run this same app again?
You can see that our visit counter left off from the first run — but of course it did; we’re using stateful grains! Just as a note again, because we’re using the memory provider, once the SiloHost is brought down, the grain’s state will not be kept. This state would not be destroyed on silo shutdown when using other grain storage providers.
Hopefully this helps others start to see the powerful possibilities that Orleans offers — Actors, grains, and grain state are barely scratching the surface of what Orleans can do. Hopefully I’ll have more to write about regarding Orleans sometime soon!
Full code at this point can be found at https://github.com/Kritner-Blogs/OrleansGettingStarted/releases/tag/v0.11
Related:
Working with .net core, this was very much what I was dealing with. It got quite tedious to manage NuGet package versions across 20+ projects, especially when .net core was pre 1.0 release, when you were having new packages available sometimes multiple times a day! How can one manage all these package version and keep them in sync?
For a while, I didn’t really know what to search for, and I think my issue was I was being too specific in my search terms.
The answer, at least one of them, lies in a solution wide variables file Directory.Build.props (documentation here). In this file you can specify things like variables, and other “pieces” that should be present in csproj files at and deeper than the directory where the Directory.Build.props file is contained. Additionally, this file works in an “inheritance” sort of manner in that “deeper” Directory.Build.props files are able to override properties set in “higher” files.
As far as the NuGet packages are concerned, here’s a sample demo…
Starting with a project with three “empty” class library projects:
Let’s bring in a NuGet package for demonstration purposes, and I’ll use Kritner.SolarProjection (more information here) as the package brought in. The package can be added to all three projects via nuget package manager console, the gui, or by adding the following to the csproj files for ClassLibrary 1, 2, and 3:
1 |
|
The solution should now look like:
Now, pretend we have more projects we’re working with, and they all depend on Kritner.SolarProject. Additionally, imagine there are new versions of the package being released frequently — and we want to keep updated, because why not; our project has unit tests, integration tests, great asserts with awesome code coverage! We are set for updating our NuGet packages as they come out; at least minor revisions.
If we had more than 3 projects, say 20, that would mean updating the “1.0.0” version for Kritner.SolarProjection that many times, and hoping we don’t miss one! Directory.Build.props to the rescue!
I want to start referring to the “version” portion of Kritner.SolarProjection as a variable — NuGet-Kritner-SolarProjection.
Let’s create the Directory.Build.props file and do that:
And to plug it into our csproj files:
1 |
|
Apply that same change to all 3 project files, rebuild, and voilà!
Using the above makes keeping NuGet package versioning simple! There are other things you can do with this of course, but I’ll leave that perhaps for another day.
The code for this post can be found here: https://github.com/Kritner-Blogs/DirectoryBuildProps/releases/tag/v1.0
Related:
Another popular .net actor framework is AKKA.net, though I’ve not worked with it — and barely Orleans for that matter. Anyway…
From Wikipedia:
The actor model in computer science is a mathematical model of concurrent computation that treats “actors” as the universal primitives of concurrent computation. In response to a message that it receives, an actor can: make local decisions, create more actors, send more messages, and determine how to respond to the next message received. Actors may modify their own private state, but can only affect each other through messages (avoiding the need for any locks).
In a monolithic system, you can more or less only scale “up”. With systems built using microservices, actors, etc, you have the option of scaling “out”. What does scaling “up” vs “out” mean? To scale a system up, means adding more RAM, more CPU — more resources, to the hardware in which your system runs; but you are still constrained to a single “box”. To scale “out” means you can just add a brand new machine, generally to a “cluster” of some sort, that allows your system to much more easily add additional resources. Sure, you can always add more RAM/CPU to your existing machines in a microservices system, but you also have the option to have more machines! Options are always nice!
What does this all mean? With all the cloud services, containerization, and VMs readily available in today’s world, it can be extremely simple to spin up and down resources as necessary. Just add a new node to the cluster!
Note all this information, and in further detail, can be found in the Orleans documentation. Orleans works off of a few concepts:
I’m hoping I can put together some more functional application as I learn more, but just to get started…
An Orleans application consists of a few separate pieces, generally all as separate projects:
Let’s get started!
1 |
|
GrainInterfaces / Grains csproj:
1 |
|
Client csproj:
1 |
|
Server csproj:
1 |
|
That’s all that’s needed to get started with “getting started with Orleans”! The repo at this point in time, while minimal, can be found at: https://github.com/Kritner-Blogs/OrleansGettingStarted/tree/8944333ae23f21e7873a356a191ceceb3cc91c97
Note in the image and repo linked above I had missed a dependency at this point. The SiloHost project should additionally have a reference to the Grains project, that would not be reflected in the above point in time. You could also go ahead and add references to Microsoft.Extensions.Logging.Console in the Client/SiloHostas well (will be needed later).
Let’s start with the most basic example — hello world. This won’t really show off what Orleans can do very well, but we have to start somewhere right?
Let’s introduce a IHelloWorld
interface in our GrainInterfaces project:
1 |
|
A few (maybe?) non standard things happening in the above from what you may be used to:
IHelloWorld
implements IGrainWithGuidKey
— an interface that defines an Orleans grain, and its key type. I believe all key types get converted to a Guid
in the end anyway, so this is what I usually stick with unless there is some unique contextual data that can be used for grain identification.Task<T>
— all Orleans grains should be programmed in an asynchronous manner and as such, all grains will return at a minimum Task
(void), if not a Task<T>
(a return value).The above grain interface simply takes in a string name and returns a Task<string>
.
Now for the implementation in the Grains project, class HelloWorld:
1 |
|
Again, mostly standard stuff here. We’re extending a base Grain class. implementing from our IHelloWorld, and providing the implementation. There’s really not much to our method, so AFAIK no reason to await the result (can someone correct me if I’m wrong? Async/await is still quite new to me).
We now have all that is necessary for Orleans to work, aside from that whole Client/Server setup and config — on to that next!
The working repo as of this point in the post can be found: https://github.com/Kritner-Blogs/OrleansGettingStarted/tree/d244f6e67384d8e992e15625f619072863429663
Next is the client and server setup, which we’ll be doing in our currently untouched projects of Client and SiloHost.
Note the below configuration is specifically for development, it does not, and cannot operate as a cluster of nodes (AFAIK) like a production configuration can/should.
Client.Program.cs (note more or less copied from (https://github.com/dotnet/orleans/blob/master/Samples/2.0/HelloWorld/src/OrleansClient/Program.cs):
In the above there’s a fair amount of logic going into making sure we can successfully get an instance of IClusterClient
. This bootstrapping of the client only needs to be done in one place (and if you have multiple applications that use the same client, could be extracted to a helper class).
The actual “work” of the IClusterClient
from a grain perspective is all done in the method DoClientWork.
SiloHost.Program.cs (more or less copied from https://github.com/dotnet/orleans/blob/master/Samples/2.0/HelloWorld/src/SiloHost/Program.cs):
That should be everything we need to get our Orleans demo working — and luckily the client/server configuration doesn’t really change much after its done, though the initial setup can be a bit tricky (most of the reason why i just copied the sample’s example).
Note: I added an additional NuGet package to both the Client and SiloHost projects to allow for pretty logging within the console window.
With an Orleans project, your normal application (Client as example) is reliant on the SiloHost being up and running. There is some retry logic built into the above client implementation, but not a bad idea to bring up the server prior to the client.
Let’s do that:
dotnet run
. You should be presented with something like:Your silo host should now be up, running, and await requests.
dotnet run
. You should be presented with something like:The left side is the Logger info from the SiloHost, and on the right is the Client app. You can see through the highlights that the SiloHost opened a socket when the client connected, and closed it the client completed executing. On the client side, you can see that we entered our name, and the Orleans SiloHost sent it back!
The above is of course, just a simple example, but it helps set the foundation of potentially great things to come!
The repository at this point of the post can be found at https://github.com/Kritner-Blogs/OrleansGettingStarted/releases/tag/v0.1
]]>From Wikipedia:
Abstraction, in general, is a fundamental concept to computer science and software development. The process of abstraction can also be referred to as modeling and is closely related to the concepts of theory and design. Models can also be considered types of abstractions per their generalization of aspects of reality.
Hmm, that didn’t really clear up much for me. Labels are hard for me, but I tend to think of abstraction as concept modeling by defining the “what needs to happen”, as opposed to the “how a thing needs to happen”.
Abstractions are concepts, not details. People use abstractions every day, without necessarily understanding the details about how the abstraction works. A simple example of this could be the abstract idea of your car’s gas pedal. You may not know how the internals of an engine work, but you do know that the idea behind that pedal is “make car go vroom vroom”. To a consumer of the abstraction, the details of how an abstraction accomplishes what it intends are unimportant, the important thing is that it does it.
Abstraction is a means of organization, and organization is needed for clean, easy to follow code! Traditional ways to accomplish abstraction is by utilizing:
Yes, the above list does pretty encompass most language features, but some of the bullet points can be more useful than others from a high level abstraction perspective.
I find interfaces and model classes to be the most useful tools for modeling a concept, as they allow you, and even force you to think about the problem in smaller chunks. Interfaces are all about defining method signatures, as stated previously — the “what” needs to be accomplished, not the “how”.
To use an example:
With a (not so great) level of abstraction, you could create a class such as:
1 |
|
While the above does work just fine(ish), and will end up being a part of our “end result”, it’s not the greatest piece of code from a caller’s perspective.
How could/would a caller consume this code?
1 |
|
In the above class, your caller is tightly coupled to the MyObjectDbRetriever
. Why is this bad? A few reasons:
MyObjectDbRetriever
is directly referenced by the controller. This means that there is no testing the controller logic, without the database logic — making unit testing very unlikely.MyObjects
from the database using MyObjectCriteria
“ rather than “I need MyObjects
using MyObjectCriteria”Working from the above MyObject
example, let’s change a few things. Let’s introduce a “what” to our abstraction, rather than just the current “how”.
1 |
|
Now, we have a contract, an idea, a “what” abstraction. We can now modify the the original MyObjectDbRetriever
to utilize this interface:
1 |
|
This is the exact same class as used previously, except now it’s implementing our idea of IMyObjectRetriever
. How does this change things on the controller, you may ask? In a very interesting way! Now that we’re programming to an interface, rather than concretion, dependency injection becomes an option for us.
Dependency injection is one way to achieve the “D” in the SOLID design principles — Dependency inversion. The basic idea of this is that high level modules (The controller) should not depend on lower level modules (the MyObjectDbRetriever
). This principle was obviously being violated in the first example, but what has changed to prevent it now?
Let’s take another look at the original MyObjectController
1 |
|
In the above, the “high level module” controller is very dependent on the “low level module” of MyObjectDbRetriever
. Utilizing our new interface and constructor dependency injection, we can change that!
1 |
|
In the above implementation, only a few things have changed, although they’re very important changes! Now, we have a constructor that takes in an implementation of IMyObjectRetriever
. The function GetMyObjects
now calls the interface method of GetObjects(myObjectCriteria)
, rather than the concrete db method. The controller class is no longer dependent on the MyObjectDbRetriever
or database! Now, the controller class is simply dependent on the idea of an interface that can retrieve data, how it goes about doing it is unimportant to the context of the controller — loose coupling!
What if the thing calling our controller has different behaviors depending on the nature of the data returned? The above change means that we can now more easily test the controller by use of mocks, fakes, or shims. Previously, when using the MyObjectDbRetriever
, we would have to ensure our database is returning specific data requirements, for several potential scenarios, from our actual database. Now as an example, we can throw a few other classes that implement our interface, and return data based on our testing requirements.
1 |
|
Because all of the above classes implement IMyObjectRetriever
it’s simply a matter of passing in instances of our fake classes for testing our specific scenarios. I would generally use “mocks” in such a scenario, but these fakes are easy enough to demonstrate as well.
I feel like this only scratches the surface of abstraction, but hopefully this helps others have that “click” moment!
Related:
]]>As a baseline here’s what I’m currently working with from SSL Labs:
An “A”, not terrible. This is the first time I’m really going through this report, not really sure what should keep an eye on, but let’s take a look.
Green and yellow — this seems promising! “more info” under DNS CAA points me over to https://blog.qualys.com/ssllabs/2017/03/13/caa-mandated-by-cabrowser-forum — tldr seems to be add a record through your DNS that whitelists specific CAs, in my case let’s encrypt.
I use DNSimple as my DNS, and it was pretty straightforward to add the record (and I’m doing this as I type, so hopefully I don’t screw it up!).
Okay, so the CAA record is taken care of, let’s see what else is going on in the SSL Labs report…
TLS and SSL are different methods of accomplishing HTTPS, TLS being the successor to SSL. From the looks of this, it’s a good thing my site supports TLS 1.1 and 1.2, a bad thing it supports TLS 1.0, and a good thing all flavors of SSL are not supported. TLS 1.0 being a bad thing to support makes sense — since it was end of lifed on 2018–06–30.
A large remainder of the warnings in the SSL Labs report seems to be centered around the fact that TLS 1.0 is supported:
So let’s see about getting TLS 1.0 disabled through my nginx config.
I recalled an “ssl.conf” file from the mapped volume in the previous post — though I had not made any changes to it up to this point. Since I will likely need to make changes to this file (it makes sense that SSL related settings would be here, no?), I will be adding this file to a new docker volume; so I can check in changes to the file.
A snippet of my original docker-compose file:
1 |
|
The new addition to the volumes portion of the file:
1 |
|
This will allow my ssl.conf file to be mapped within the docker container, overwriting the original image’s ssl.conf; no API keys, passwords, etc in this file, so might as well keep its changes in source.
The entire docker-compose file now looks like:
1 |
|
Next, onto the ssl.conf itself. The original ssl.conf is:
1 |
|
This all seems pretty standard and simple to figure out. Under “protocols” you can see there is a TLSv1 listed, which we’ll be removing. There is also a commented out line regarding HSTS, and I can’t really think of a reason to keep that disabled. Those two changes make the entire file look like:
1 |
|
I think that’s pretty much everything — we added a CAA record, disabled TLSv1, and made a few modifications to support the TLS change in our docker-compose file.
Let’s see what SSL Labs thinks now:
Woohoo! A+! Here’s the GitHub PR related to changes.
Related:
]]>This whole unix, docker, nginx, stuff is pretty new (to me), so maybe it’s just something simple I was missing the whole time. Nonetheless, I’m hoping this will help someone else, or me several months down the road if I decide to do it again.
I have a .net core website, being hosted via kestrel, running on docker, with a reverse proxy via nginx. Up until now, that reverse proxying from nginx was only working over http/port 80. I don’t know a whole lot about reverse proxies, but from the sounds of it, it can take in requests, and forward them to a specific location on behalf of the requester. In my case, the nginx container receives http requests, and nginx forwards that request onto my kestrel hosted .net core site. Is that right? Hopefully!
As mentioned previously, the nginx was only working with http traffic, and I was having a lot of trouble getting it working with https, the original configuration is as follows:
docker-compose:
1 |
|
In the docker-compose file, i’m using two separate containers — the website, which exposes port 5000 (on the docker network, not publicly), and nginx which operates on port 80.
nginx.conf
1 |
|
In the config file, we’re setting up an upstream server with the same name that we’re calling our container service from the docker-compose file kritner-website-web:5000.
Note, all the above can be found at this commit point on my website’s repository.
Letsencrypt is a certificate authority that offers free certs to help secure your website. Why is HTTPS via TLS important? Well, there’s a whole lot to that, and how it works, but the basic idea is the users traffic is encrypted on either end prior to being sent to the other end. This means if you’re on public wifi, and on https, someone that was “sniffing the wire” so to speak, would see that traffic is occurring, but not the content of said traffic, since both ends are encrypting/decrypting said traffic with the same encryption key. If you were on an http site, this traffic would be sent back and forth in plain text — meaning your data is in danger of being eavesdropped on! Maybe I’ll write a bit more about encryption at some point (note to self) — especially since it’s something I’m doing as my day job!
So letsencrypt — it’s a service I’ve used before, and there are various implementations to try to make it as easy as possible to use. Through research for this post, I happened upon:
ACME Client Implementations - Let’s Encrypt - Free SSL/TLS Certificates
Although I hadn’t really found this page until just now, maybe it would have been useful prior to my adventure beginning. I wanted to use letsencrypt along with my docker container website, and nginx, with as little maintenance as possible, as letsencrypt certificates are only good for 90 days. In my research, I happened upon a docker image linuxserver/letsencrypt that promises to utilize nginx, letsencrypt certificate generation, AND auto renewal. Sounds awesome! While the documentation of the image seems mostly adequate, at least I would assume, for someone well versed in all of this process; I found it to be lacking. The whole setup process took me some time to figure out, hence this post, to hopefully help out the next person, or me in the future!
The things I most struggled with when getting this linuxserver/letsencrypt image up and working were:
Docker volumes (doc):
Volumes are the preferred mechanism for persisting data generated by and used by Docker containers. While bind mounts are dependent on the directory structure of the host machine, volumes are completely managed by Docker. Volumes have several advantages over bind mounts
The letsencrypt has a lot of configuration to go along with it, it took a while for me to realize, but I needed a volume that mapped from a directory on the docker host to a specific directory on the letsencrypt image. I eventually accomplished this in the compose file like so:
1 |
|
The first item in the array (${DOCKER_KRITNER_NGINX}:/config) takes a new environment variable that maps the host directory (defined in the variable) to the /config within the docker container itself. This means that the docker host (at the env var path) will contain the same config as the docker container at the secondary portion of the volume mapping (/config)
The second item (./nginx.conf:/config/nginx/site-confs/default) maps my local repositories nginx.conf file (the file where I set up the reverse proxy) to override the /config/nginx/site-confs/default file on the docker host and container.
The full list of files that I ended up needing to modify for my particular situation was:
The dnsimple.ini configuration was add my api key, and the …/default houses the nginx configuration.
The final default configuration I ended up with is:
1 |
|
There are a few changes from the default that was there, which I’ll try to highlight next.
1 |
|
Above is pretty cool, since docker has its own internal DNS (I guess?) you can set up an upstream server by the containers name, in my case “kritnerwebsite” (note i changed it from earlier in the post, which was “kritner-website-web”).
1 |
|
Uncommented out this section from the default, applied my server_name of “kritnerwebsite”
1 |
|
In the above, it’s mostly from the “default” save for “location” and everything within that object. Here, we’re setting up the reverse proxy to forward requests to “/” (anything) to our http://app_servers (kritnerwebsite as per our upstream).
Our docker compose file didn’t change a whole lot from the initial, but there were a few notable changes, which I’ll also get into describing:
1 |
|
for the new parts:
1 |
|
Using a different image — linuxserver/letsencrypt instead of nginx. This image has nginx included, but also certbot, along with a cronjob to run certbot at application start.
1 |
|
Now we’re using both http and https ports (though note, we’re redirecting http calls to https via the nginx config.
1 |
|
Already discussed earlier in the post, using these volumes to properly set up the nginx configuration, with our dnsimple api key, as well as our reverse proxying to the kritnerwebsite.
1 |
|
Environment variables needed as per the letsencrypt documentation at:
all the above changes, experimenting, failing, and then finally succeeding can be found in this pull request:
Nginx by Kritner · Pull Request #24 · Kritner/KritnerWebsite
The final result?
and from https://www.ssllabs.com/ —
Not an “A+”, but really not bad for using one pre-built docker image for my HTTPs needs!
Related:
]]>IServiceProvider
and utilizing IOptions
… so that brings us here. In the process of needing configuration for the first time in a console app — crazy I know. The project is currently using AutoFac as its IOC container — though having to look into .netcore’s built in IOC container, I may want to switch to it!
The basis of wanting to utilize configuration for the app for the first time is utilizing differing endpoints for external resources, depending on the environment. These configuration values would be loaded at the applications entry point (or thereabouts) and would need to be accessed deep within the internals of the app, very likely not even within the same project.
How can I do this without having to set some static member somewhere in which everything has access? That led me to find IOptions
(Doc) — T being a configuration class. IOptions
allows for the injection of configuration values into a class, this is exactly what’s needed, and avoids the thing I was worried about having to either pass a configuration collection all over the call stack, or using a static member somewhere in the app.
The first thing we need to do in the console app, is to create a configuration file.
appsettings.json :
1 |
|
and load it in the entry point of our console app
Program.cs :
1 |
|
Ok! File loaded, it currently does nothing! Next, we’ll want to load an environment specific json file, but in order to do that, we’ll need a concept of an environment. Seems like the environment is often controlled via an “environment variable” (no relation?). There are various ways to set environment variables, depending on OS. Some of those methods include:
I’m going to set a new environment variable for a seemingly standard ASPNETCORE_ENVIRONMENT
to “local”. Another sample environment we’ll use is “test”.
Now we can go about creating a few new configuration files for the other environments.
appsettings.local.json :
1 |
|
appsettings.test.json
1 |
|
Now we have a “base” configuration appsettings.json, and environment specific configurations appsettings.local.json and appsettings.test.json. This coupled with our new environment variable should allow us to start working with some configuration in a meaningful way (pretty soon).
For now, let’s take a look at what loading the different environment configuration files looks like. From our original example of Program.cs
1 |
|
Let’s make a few updates:
1 |
|
In this above, you can see we’re loading into env the value stored in the environment variable ASPNETCORE_ENVIRONMENT, when/if this variable isn’t available we (currently) throw an exception. We then print the environment variable value we loaded, and finally load the appropriate appsettings.{env}.json. You can see the loaded environment changes depending on the value of the environment variable ASPNETCORE_ENVIRONMENT.
Now that we’re successfully loading configuration files based on an environment variable, let’s get into some IOptions
First thing we’ll need is a configuration class, we’ll do something nice and simple like environment specific configuration for a API endpoint:
ApiConfig.cs
1 |
|
In the above we just have a class defined, and we would create json to represent those classes in each of our environment configuration files.
appsettings.local.json
1 |
|
appsettings.test.json
1 |
|
We now have enough “stuff” in place that we can load something into an IOptions
— our ApiConfig, or IOptions<ApiConfig>
.
We’ll make another change to our Program ctor:
1 |
|
A few new things above:
We can now “resolve” our registered components as per the normal dotnetcore resolver, and our new IOptions
can be used like so:
SomeClass.cs
1 |
|
The environment configuration loaded will determine which “instance” of ApiConfig
we inject into SomeClass.
One last hiccup on my end, is I’m actually using AutoFac, and not the .net core IOC container . Due to this all my resolutions are occurring through AutoFac, while my IOptions
are being registered through .net core’s IOC container.
This is another pretty simple change (though it at least took me a while to figure it out). I ended up throwing together a new helper method that takes in my IServiceProvider, as well as my ContainerBuilder (from AutoFac registration). The helper method looks like:
1 |
|
and can be called directly from our normal composition root/entry point that puts together the AutoFac container.
]]>Currently, other programmers can go about doing the above by grabbing the NuGet package, but I’d like to offer something on the page itself.
A few things we’ll need:
Note all full code updates will be present at the bottom in a gist, most of the other code will just be snippets and in code blocks, since gist support can only do a full post, rather than individual files (and creating 40 billion gists for a post seems excessive).
I generally like creating my model classes and interfaces first when designing something new That being said, I believe it would make sense to start with the form parameters that will be necessary for both our form entry, and our new API endpoint.
Given the current page:
We’ll need a few inputs:
The above can be represented in the TypeScript class:
1 |
|
and c# class:
1 |
|
Next, we want to work on adding our form, I used Angular Template-driven forms as the baseline tutorial to follow on figuring this out (I’ve never done this before).
We want to start a form as so:
1 |
|
In the above, you can see I’m only showing the form when !isExpandedForm, as to hide the form with a button click, and automatically when retrieving a new set of results. Additionally, the above shows that on submit, we are to invoke the onSubmit() function — this functions definition will come into play for posting to our api, and is handled in some to be defined typescript code.
The basic template for each form “item” will be (starting with the first as sample):
1 |
|
The above is applied to all properties of our form model, all properties are numbers, and required.
Next, our submit button:
1 |
|
In the above, you can see it’s pretty standard, but using a nice angular (directive?) the only enables the submit button the form is valid (in this case all fields are required, and must be specified as numbers).
Typescript updates are next:
we have a few new imports we’ll need to make use of:
1 |
|
This will give us access to HttpHeaders and HttpParams . Both of these imports will be used for passing around our new SolarProjectionFormModel to our api.
The constructor is updated to take in an HttpClient and BASE_URL to save as instance members, for use in the api get later.
1 |
|
Set an initial state of our model (matching my solar projection) in an instance var:
1 |
|
and now for the meat and potatoes of the class, the new get function:
1 |
|
In the above, we’re doing a few new things, setting out HttpHeaders to indicate we’re passing JSON, and setting up some HttpParams to contain a jsonified version of our model.
The above function os what does the actual get for our projection, it’s called in a few places, one of which being on init, and also as a part of the onSubmit() function described earlier:
1 |
|
Notice how onSubmit()
calls both toggleFormInput()
(to hide the criteria form), and getProjection()
Finally, time for the new .net core API endpoint that will handle our parameterized get.
I am not a fan of how I implemented this, I feel like I should be wrapping both the parameters and result in an object to convey status and types… it just currently feels a bit yucky — perhaps I’ll pursue that next.
1 |
|
In the above, I’m taking in a string that represents my model type ProjectionParameters defined earlier. Converting that string into its object representation, then calling my projection service. I don’t know what happens yet if bad data is sent in, but I feel like I need to take a look at this implementation in a number of ways already pointed out previously.
That should do it! I did a few other minor things here and there not pointed out, but the entirety of the source can be found:
Page now looks like:
And gists of (most) of the files from this post:
Getting some of this working was a bit challenging coming from someone whose never worked with angular forms and very little with web api — so hopefully this will help someone else out eventually! :)
Related:
]]>I’d like the cell to be shaded green when I’m making money on the solar panels (any positive number) and red when the panels are costing me more than just what the base utility cost would be (any negative number). With that, it was just a few steps:
CSS
1 |
|
Typescript
1 |
|
and the basic “template” to plug into my view
1 |
|
The entirety of the table section of code now is:
1 |
|
I’m not sure if there’s a way to combine the inTheGreen and !inTheGreen checks into a single call, or it if much matters, but it’s a little lengthy right now.
Next time, perhaps I’ll start digging into implementing some charting and/or utilizing a datagrid so it’s a little “prettier” and more interactive.
Related:
]]>So custom pipes, will allow me to write my first function in TypeScript, woohoo! I’ve never been a fan of JavaScript, so TypeScript sounds pretty great considering it (seemingly) C#-ifies JavaScript. More info at http://www.typescriptlang.org/. Note — I say the first function I write, because it really is — the bit of typescript displayed in previous posts was just interface declarations and/or information that was a part of the prebuild dotnet net angular template.
Starting from https://angular.io/guide/pipes#custom-pipes as a base, I can see the custom pipe needs to implement a PipeTransform
The complete example is (as of writing):
1 |
|
Seems simple enough, let’s adapt the above code to get our pipe — a pipe that simply takes in a number, and outputs a number +1 over the input number:
1 |
|
Easy peasy! Now to apply it to the table:
1 |
|
Becomes:
1 |
|
Let’s try it ou — RUNTIME ERROR. Oh noes, what doesn’t it work? Oh, apparently this pipe needs to be registered in my components, that should be an easy fix.
Under app-module.ts
I need to make sure to import the file:
1 |
|
and reference the pipe within the @NgModule
declaration:
1 |
|
Boom! Now when we view the page we can see:
Hurray! The year starts with 1 instead of 0!
Related:
]]>I recently started playing around with Angular for my solar projection page http://www.kritner.com/solar-projection/ and thought I’d document some of my experiences playing around with “new” tech — at least relatively speaking.
In my day job, I am a c# developer, currently solely a c# developer. Prior to this job, I was proficient in c#, db, and “okay” in some front end stuff.
To apply such formatting we can use pipes — https://angular.io/guide/pipes. Luckily, they’re simple to use, and there are a few that already exist that would work for my use case!
From https://angular.io/api I found the CurrencyPipe and the NumberPipe, both of which I will utilize on my model from the last post.
As a starting point:
1 |
|
A large portion of these numbers (like “cost”s) can be considered “currency”, while the others are generally units of kw/h, which can be considered “number”. To apply pipes, you simply “pipe” your bound data into the “pipe” you’re using (similar to how you would do in bash) {{ myData | currency }}
as an example.
Applying the above to our page, it now looks like:
1 |
|
Which will look like:
Related:
]]>So putting together this front end was a decent challenge, even for how crappy it looks. I’m not really a front end guy, so I thought I’d at least get some exposure to angular, typescript, etc. There are already tutorials for this stuff out there for sure, but I wanted to try to start blogging more, and writing things down helps me retain information.
Binding is pretty simple, given your angular template, information enclosed within: {{ }}
is bound. For my angular app, I’m using the dotnet core cli template dotnet new angular IIRC. You can do simple things such as {{ 5 + 4 }}
or more useful things, like binding to a model.
Given (a portion of) my typescript file:
1 |
|
I want to bind some (non array) information to my view…? I’m not sure what the right word is in angular.
My model data is going into a variable called solarProjection as per:
1 |
|
Now in the HTML, we simply have to bind with {{ }}
First, let’s create a div that is visible only when our data is ready, and binding some base (and flat) model data:
1 |
|
Now we have some root information present on our page, but from our model above, you can see we had some array data to display as well.
That’s pretty easy too using *ngFor
! Let’s throw our information in a table (note all of this within the div
defined above:
1 |
|
So the whole thing looks like:
1 |
|
At this point, the page looks like this:
Starting to look like… something. Next we’ll have to look into doing some formatting of the displayed numbers.
Related:
]]>With that spreadsheet I thought that it seemed like a good opportunity to try out a few new things I hadn’t - additional docker work, a NuGet package, some basic angular, typescript, more unit testing. So over the past few weeks after dinner, I’ve been tinkering around with my website and produced solar-projection. It started out all contained within my github repo of https://github.com/Kritner/KritnerWebsite, but I needed to figure out how to start playing around with NuGet, so now I have the core “solar projection” logic in its own package - its repo is located at https://github.com/Kritner/Kritner.SolarProjection.
The site is not currently pretty, but it does (hopefully accurately) tell me the information I wanted to know - solar panels seem to work out great for us, as long as we can get 90-100% power generation from the panels (and they’re guaranteed for 90% of the 17k).
I hope to be able to continue exploring angular, to make it a bit prettier with perhaps some charting, and datagridding, and perhaps turn it into a stupid little app I could maybe make a few cents off of? Currently the site only estimates my solar panel array, but it should be a quick change to allow some user inputs so others could use it too.
Oh! and if anyone’s interested, the package could be used to run the numbers before I get the user inputs in (or you could do it for me? :D). The solar array was installed via Vivint Solar, if you’re interested in getting a system, I get referral bonuses, get at me!
]]>In the previous post, we started on a business application with the requirement:
As a user, I need a way to enter a number. Once the number has been entered, I need it to be printed back to me.
The customer loves the app! But has a few new requirements for us:
As a user, I need a way to enter a number. Once the number has been entered, I need it to be printed back to me.
If a number evenly divisible by 3 is entered, the user should receive back “Fizz” rather than the number
If a number evenly divisible by 5 is entered, the user should receive back “Buzz” rather than the number
The requirements now are equivalent to the children’s problem and/or code kata FizzBuzz
Our code previously only had a single branch of logic. Get number, return number. Based on the new requirements, we can see there will be a few more branches:
The 4th branch was not stated by the requirements, but seem like something that should be asked of the business owner, as it might not have been considered, or could have even been assumed.
Our original method which looked like:
1 |
|
Will be updated to now look like:
1 |
|
Now be aware, all of our unit tests from last round, continue to pass, as the data that was being used to test the method continues to pass with our new implementation. This is often something that is brought up as a potential pitfall of unit testing and requirements changing - and it is seemingly a valid concern! Our unit tests are continuing to pass, when the requirements are much more complex than they were previously.
This is why it’s so important to take into account *both* unit tests (and their asserts) as well as code coverage. There is always the possibility that the unit tests *won’t* break as a result of new branches in your code. BUT, if you were to look at code coverage, specifically the code coverage as it applies to our method, you’ll see that not all branches of code are covered by unit tests.
As you can see from the above screenshot, our code coverage as indicated by the percent, and the purple and yellowish text has gone down. The 3 new branches within our code is not currently being covered by unit tests. Here’s the repo as of updating the method, but without the unit tests to cover the requirements: https://github.com/Kritner/UnitTestingBusinessValue/tree/bb1f9bda9250fbdb85a8737c0c006f06e6daa788
Now to write a few unit tests:
1 |
|
Hmm. We currently have a failing test. Fizz is not being returned from resultsModThree, but 9 instead. Let’s see what’s going on here.
Oh. Looks like I’ve inadvertently created a bug in my implementation of requirement #2.
1 |
|
Should have been:
1 |
|
Now that we’ve corrected the code, our new unit test passes. But our original unit test:
1 |
|
Is now failing. Of course it is - 42 % 3 is 0, so we actually received a Fizz for 42. Updating that test to have an expected value of 7 instead.
What does all of this mean? Our unit tests both helped us and hurt us in this scenario. They helped us because they helped us determine I had a logic error in my implementation of a requirement. They hurt us because we had a “false positive” pass. This is why it’s so important that unit test Asserts are relevant, and code coverage stays high. Without a combination of both of these, the business value of the tests is less significant. The updated implementation and logic: https://github.com/Kritner/UnitTestingBusinessValue/tree/78f03b8550593b9576f28e8608561f4add989879
In a non unit testing scenario, it is likely that our business logic would only be testable through the UI. UI testing is much clunkier, slower, and harder to reproduce consistently. Imagine after each change of our logic, we had to test all branches over and over again through the UI. This probably means a compile, a launch, an application log in, navigate to your logic to test, etc. Oh, and then do it three more times (due to this **simple** application’s logic). This is another reason unit testing is so powerful. As we keep making changes to our code, we can help ensure the changes we’re making are not impacting the system in ways we’re not expecting. And we’re doing it in a fraction of the time that it would take to do the same thing through manual UI testing.
Hopefully this post and the previous help show how a good unit testing suite can really help you not only have less bugs in code, but get your code tested much faster.
Related:
]]>The text book(ish) answer is: if you’re unit testing your code with relevant asserts, with good enough code coverage, the less likely there will be bugs. Sounds great! Why isn’t everyone doing it? Unit testing does require a certain style of coding, loose dependencies, and a certain amount of planning. Here’s a good SO answer that goes into some detail on how/why unit testing is great - but I like examples.
Requirements change. It’s a fact of (programming) life. Something that held true today, might not be true months or years down the road. One of the great things about unit tests and code coverage is that when considered together, you can really get a feel for if your code is working correctly, even create requirements based on your unit tests! On to the example - we’re going to build a super important piece of business logic based on this requirement:
As a user, I need a way to enter a number. Once the number has been entered, I need it to be printed back to me.
Well that sounds easy. Going to start a new github repo to track progress.
So based on our requirement. I’m going to create a console application that takes a user’s entry, and then prints it back to them.. This is probably the most useful business logic in the history of the universe.
Based on the requirement, I’ve created a class and method:
1 |
|
The above method is extremely easy to test as there is only a single branch. It should be no problem getting 100% code coverage, with a completely relevant assert.
1 |
|
And our code coverage:
With the above test and code coverage, we can safely say we have thoroughly tested our code. Our requirement is extremely simple as of now, but next time we’ll expand our requirements by a bit, while still keeping focus on our unit tests and code coverage. Here’s the repo as of this post: https://github.com/Kritner/UnitTestingBusinessValue/tree/f8b21a5bde31635c2f37d530130d8bd393eee23e
Related:
]]>Part 1
Part 2
Part 3
Part 4 you are here
I have updated the console application to use the new business object wrapper of the WCF client.
Both of those classes look like this:
Program.cs
1 |
|
WCF.Service1
1 |
|
I moved the WCF service and newing up of that client from the console application to make it easier to unit test. We are still not at a point that WCF.Service1 can be unit tested, though the service itself can.
I’ve added a new RussUnitTestSample.WCF.Tests project to my solution, and added the following tests for my Service1.svc class (the implementation of IService1).
As a reminder the IService1.cs was defined as:
1 |
|
I have added the following unit tests based on the implementation in
Service1.svc:
1 |
|
Code Coverage:
Taking a look at our code coverage, you can see that currently we have 100% coverage for our RussUnitTestSample.Wcf project, but our coverage of RussUnitTestSample.Business has gone from 100, to 54.21. This is expected of course, as we have added a Wcf Service reference, as well as a wrapper of the WCF client. I think we could technically unit test the Service Reference code, but it is auto generated, so I think I’m going to ignore it for now. Wonder if I can exclude it from Code Coverage.
So now let’s look into how to go about testing our Business.Wcf client wrapper.
WCF.Service1
1 |
|
As this class currently stands, we’re working with a Service1Client and not an interface, so it’s difficult to unit test. Let’s do a little refactoring. Instead of newing up the Service1Client, let’s take in the interface of said client. After updating our class looks like:
1 |
|
Now that we’re taking in an interface of the service, we can write some unit tests:
RussUnitTestSample.Business.Tests.Wcf.Service1Tests.cs
1 |
|
And our new code coverage:
Now we’ve hit everything except the default constructor used for Service1. Guess I’ll have to figure out how to accomplish that later. Also I added a .runsettings file to exclude “Service Reference” folders from code coverage.
Latest code as of post:
https://github.com/Kritner/RussUnitTestSample/tree/b9c2f329adbc700688fb69943cc4b7b28ffd87c4
]]>Part 1
Part 2
Part 3 you are here
Part 4
Nothing really fancy for our WCF service, the default functions created with the WCF Application should suffice.
First, add a new project to the RussUnitTestSample solution:
Right click solution -> Add -> New Project…
WCF -> Wcf Service Application. Named RussUnitTestSample.Wcf
Your newly added project should look similar to:
Next, we’ll want to configure our project to have multiple start up projects (both the console app, and the wcf service), additionally we will add the WCF service as a service reference in the console application.
Multiple startup projects. Right click solution -> Properties
Select multiple startup projects, change the combo boxes so both the console application, and the wcf application are set to “start”
Find the port the WCF service is set to run on next. Right click the WCF project -> properties
Copy the URL highlighted for use in the next step
Next, we’ll add the WCF project as a service reference to the console application.
In the console application, Right click “References” -> Add Service Reference…
Paste the URL copied before (localhost:portNumber/) -> Discover -> Drill into
service and select your interface (IService1)
Your project should now display a new Folder “Service References” and have the service reference listed. Additionally notice my app.config file has been automatically checked out, as WCF endpoint information has been added.
Here is what was added to the config file
1 |
|
Now our service reference is all added and ready, let’s test it! Modify the Program.cs
of the console application with:
1 |
|
Your Program.cs
should now look like:
1 |
|
Give it a run and:
Now our WCF service is hosted, and successfully consumed in the console application. Diff in previous and current can be found on GitHub, note a lot of files in the pull request are auto-generated from the WCF service.
Next, we’ll look at how to test it.
This time, I’m going to explore mocking and testing objects relying on the IDbGetSomeNumbers
and INumberFunctions
interfaces. As a reminder, those interfaces and corresponding classes are defined as:
1 |
|
And the class utilizing them:
1 |
|
In the constructor, I’m taking in an implementation of both IDbGetSomeNumbers
and INumberFunctions
. I am doing this, as they are not dependencies for the functionality of the class, and as such their implementation is not important. Rather, it is important, but not for the testing of this class. As the unit testing definition stated: Unit testing is a software development process in which the smallest testable parts of an application, called units, are individually and independently scrutinized for proper operation.
So the interface implementations do need testing (which was already done), they however do not need testing from GetNumbersAndAddThem
s concern. The only thing that needs testing from this concern, are that the class is constructed properly, and that Execute “gets numbers from the db” and then “adds them”.
Since I’m using the class constructor to take in the class dependencies:
1 |
|
The first things we can test for are that dbGetSomeNumbers
and numberFunctions
are not null. This can be accomplished as such:
1 |
|
Now for testing Execute we can finally get to Moq! Mocking goes hand in hand with unit testing, as one definitionof mocking states:
It is difficult to test error conditions and exceptions with live, system-level tests. By replacing system components with mock objects, it is possible to simulate error conditions within the unit test. An example is when the business logic handles a Database Full exception that is thrown by a dependent service.
So because the implementation of IDbGetSomeNumbers
and INumberFunctions
do not matter, we would not want to (necessarily) use their real implementations. This is because they could potentially impact the system or data, which we wouldn’t want to do, as we plan on running these tests at every build… and editing application data at every build would be… bad. Anyway, with mocking we can tell the interfaces upon being invoked, to return a specific response. This means we can make the Execute functionality use completely mocked implementations of their dependencies, just test the the function Execute takes in and passes back the appropriate types of values. Mocking setup:
1 |
|
The fields _mockNumberFunctions
and _mockIDbGetSomeNumbers
are set up as Mock<interface>
. In Setup
we’re just simply newing them up. Now to the good parts, the tests utilizing the mocks:
1 |
|
In _mockIDbGetSomeNumbers.Setup(…).Returns(…)
We’re stating that when the GetSomeNumbers()
function is called, it needs to return numbersToUse
. Pretty fancy! Rather than relying on our concrete implementation of IDbGetSomeNumbers
which has to go out to the database, we’re telling it to use this defined list of numbers that have been spelled out by the setup of the mock. Now we can with absolute certainty say what the sum of the numbersToUse will be, because we know what numbers will be provided each time since they aren’t being pulled from the database. Hopefully that all makes sense. Makes sense to me anyway! :O
Next time I hope to get into WCF creation and testing.
]]>Part 1 you are here
Part 2
Part 3
Part 4
So getting started with unit testing - first it should be defined what a unit test is.
From https://en.wikipedia.org/wiki/Unit_testing:
In computer programming, unit testing is a software testing method by which individual units of source code, sets of one or more computer program modules together with associated control data, usage procedures, and operating procedures, are tested to determine whether they are fit for use.
Given the following classes/methods:
1 |
|
Note in the above, I am using interfaces to allow for the injection of dependencies (an important part of unit testing with mocks, and in general). The basic idea is you provide sample (unimportant) implementations to the dependent pieces of the whole, the pieces that are not currently being tested, therefore are unimportant to the test - at least when testing the “Put it all together” methods.
I see the following things that need to be tested - there could very well be more, but here it is at a glance:
INumberFunctions.AddNumbers
IDbGetSomeNumbers.GetSomeNumbers
GetNumbersAndAddThem.Execute
There are a few other stragglers in there that will become apparent (if they aren’t already) like null testing parameters in the constructor, testing empty array for add numbers, etc.
For INumbersFunctions.AddNumbers
, we need to of course, check the numbers are being added properly. I have accomplished that with the following tests:
1 |
|
There is most definitely some overlap in some of the tests, but with something so simple there’s still quite a few! I don’t feel the actual implementation of NumberFunctions is important, as I’m concentrating on the tests.
That takes care of the class that has completed non Moq-ed tests. In the next post (which I will hopefully do soon) I’ll go into how I accomplished my first unit tests with Moq. If I can get a well enough cadence going on, I hope to cover Moq-ing WCF service calls - as that’s what we use at work for our communication to our DB, so being able to moq that as well would be beneficial.
Full code including the Moq unit tests can be found at: https://github.com/Kritner/RussUnitTestSample
As a developer without a build server, you might be in a situation where you have a project that builds perfectly fine locally, but when another developer attempts to build your latest bits, you encounter compile errors as far as the eyes can see. I unfortunately have experienced such a situation for each project I have pulled from source control (in instances where a build server was not used) - not that I fault the organization, persons, or projects involved - if you don’t know better, you don’t know better.
Once you do know about build servers, I do feel it is important to implement one if at all possible, as they are relatively easy to configure, and once done, an inordinate amount of time can be saved across developers.
I only really see two reasons to not utilize a build server… and one is more of an excuse than a reason. The first reason was mentioned above, if you don’t know about a build server process, then you likely wouldn’t have one. The second reason (the excuse) - would be thinking it’s “too hard” or “not worth it” to set up. If the build server is too hard to set up, that likely means your manual build process is quite complex, and could likely benefit more from a build server than a simple application. If grabbing a project from source control for the first time gives you a nice 10-15+ errors, which can take anywhere from 5 minutes, to several hours to resolve - and involve several developers - then you really need to think about what needs to be changed in order to fix that.
Are there external libraries being utilized that need to be added to source? Are there several SDKs missing from the developers machine required to build? Did I miss something in check in that would not allow the next developer to build? All of those questions can be quite difficult to deduce when building locally. With a build server, it’s like a separate developer working on a project for the first time, every time, at every check in.
If some new dependency is added to the project and is missed in the check in, the build server will immediately report failure and the developer (could) be notified as such, and actions can be taken to correct. Without a build server, it could be quite the mystery as to why a project all of a sudden won’t build, or why a project will not build for the first time.
So why don’t you have a build server yet?
There are lots of tutorials on setting up build servers, and there are lots of build servers even! The build server I use on my personal site is TFS Build Service/MS Build I think the tutorial I referenced was: https://msdn.microsoft.com/en-us/library/ms181712.aspx
Some of other build servers include:
Jenkins (https://jenkins.io/)
Bamboo (https://www.atlassian.com/software/bamboo)
TeamCity (https://www.jetbrains.com/teamcity/)
ANT (http://ant.apache.org/)
GRUNT (http://gruntjs.com/)
etc..
Having a build server gets you and/or your organization a lot of benefit, but in my opinion, one of the best benefits is the ability to implement automated deployment. Once a build is completed, steps can be taken in a number of ways which can vary greatly dependent on project complexity, your project’s bits can be deployed to your next environment, AUTOMAGICALLY.
Related: